> ## Documentation Index
> Fetch the complete documentation index at: https://docs.payglocal.in/llms.txt
> Use this file to discover all available pages before exploring further.
# PayGlocal Dashboards
> Learn about the Glocal Command Center (GCC) — PayGlocal's merchant dashboard — and how to access each environment.
## What is GCC?
At PayGlocal, the merchant dashboard is called the **Glocal Command Center (GCC)**. Use it to:
* Track transactions and download reports
* Manage cryptographic keys and credentials
* Configure payment products and settings
* Monitor recent transaction and API activity
You'll need GCC access before you can complete any PayGlocal integration.
***
## Two GCC Environments
PayGlocal operates **two separate GCC instances** — one for testing, one for live operations. Use the environment that matches what you're doing — building/testing or going live.
**For sandbox testing.**
No real money moves. Use this environment while building and testing your integration.
**URL:** [gcc.uat.payglocal.in](https://gcc.uat.payglocal.in)
**For live operations.**
Real transactions. Switch here only after completing sandbox testing and receiving go-live approval.
**URL:** [gcc.prod.payglocal.in](https://gcc.prod.payglocal.in)
Never mix UAT credentials with Production. Each environment has its own separate username, password, keys, and Merchant ID.
These are **dashboard** URLs for logging in — not the API base endpoints your code calls. For API base URLs, see [Authentication](/authentication).
Your account manager may reference alternate hostnames such as `merchant.uat.payglocal.in` or `merchant.payglocal.in`. Use whichever URL you were given during onboarding — each points to the same environment as its matching GCC URL.
***
## How to Log In
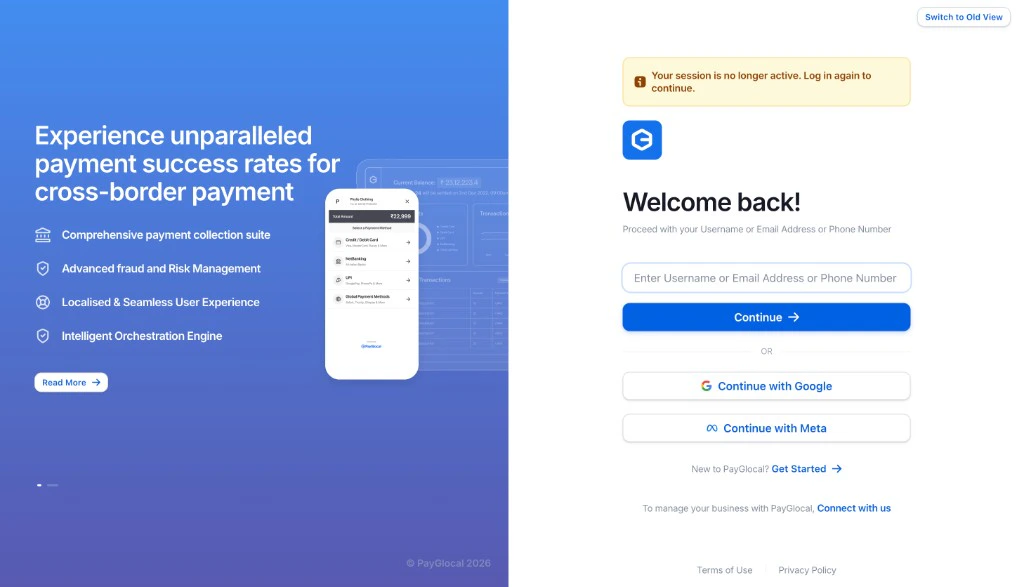
Go to the GCC URL for your environment — **UAT** for testing, **Production** for live. Use the links in the cards above.
Sign in with the **username and password** issued by PayGlocal during onboarding.
Complete any **second factor** (OTP) if your account requires it.
 If you do not have credentials yet, contact your **PayGlocal account manager** or reach out at [sales@payglocal.in](mailto:sales@payglocal.in).
***
## Business Overview Dashboard
After you log in, you'll land on the **Business Overview** page, where you can:
* View successful payments and settlements
* Track funds on hold and open disputes
* Access quick actions like creating payment links and viewing API keys
* Monitor recent transaction activity
If you do not have credentials yet, contact your **PayGlocal account manager** or reach out at [sales@payglocal.in](mailto:sales@payglocal.in).
***
## Business Overview Dashboard
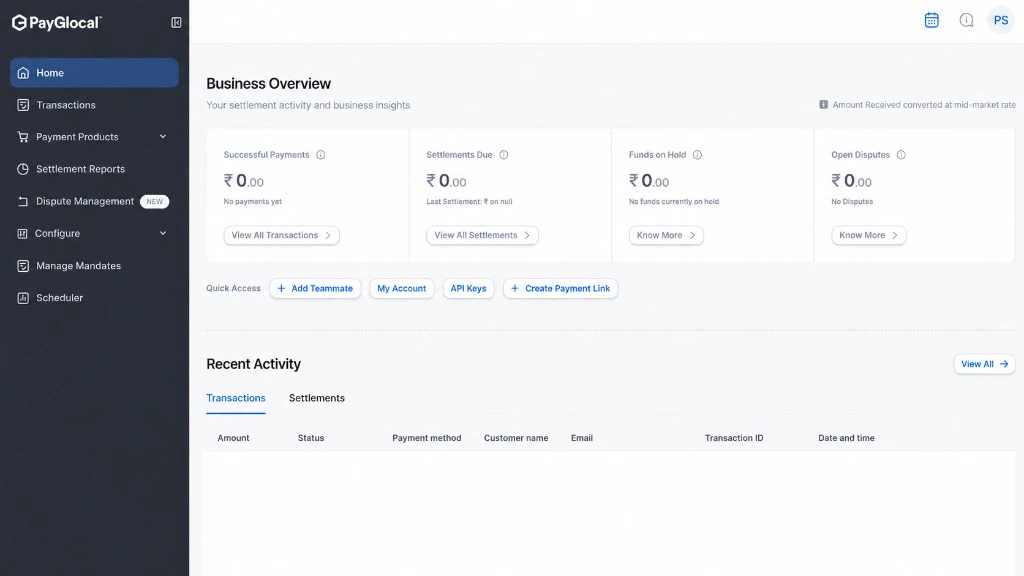
After you log in, you'll land on the **Business Overview** page, where you can:
* View successful payments and settlements
* Track funds on hold and open disputes
* Access quick actions like creating payment links and viewing API keys
* Monitor recent transaction activity
 ***
## Next Steps
Once you are logged in, your next task is to set up your cryptographic keys and copy the credentials needed for API calls.
Generate your private key, copy your Merchant ID and Key IDs from GCC, and prepare for API integration.
***
## Next Steps
Once you are logged in, your next task is to set up your cryptographic keys and copy the credentials needed for API calls.
Generate your private key, copy your Merchant ID and Key IDs from GCC, and prepare for API integration.