> ## Documentation Index
> Fetch the complete documentation index at: https://docs.payglocal.in/llms.txt
> Use this file to discover all available pages before exploring further.
# Bagisto
> Accept payments on your Bagisto store using PayGlocal - configure and go live in minutes.
## What is Bagisto?
[Bagisto](https://bagisto.com) is an open-source Laravel-based e-commerce platform that provides a flexible and feature-rich solution for building online stores. It offers multi-channel, multi-currency, and multi-locale support out of the box.
## Bagisto with PayGlocal
Integrating PayGlocal with Bagisto enables merchants to accept cross-border payments through international debit/credit cards and other payment methods. The PayGlocal payment gateway is built into Bagisto, requiring only configuration of your merchant credentials.
Before following the steps below, ensure you have a **PayGlocal merchant account**. [Contact us](mailto:support@payglocal.in) to create one.
## Prerequisites
* An active Bagisto installation (v2.x recommended)
* Admin access to your Bagisto dashboard
* PayGlocal merchant credentials from your [PayGlocal dashboard](/getting-started/dashboard-and-key-management)
## Configuration Steps
Follow these steps to enable PayGlocal payments on your Bagisto store.
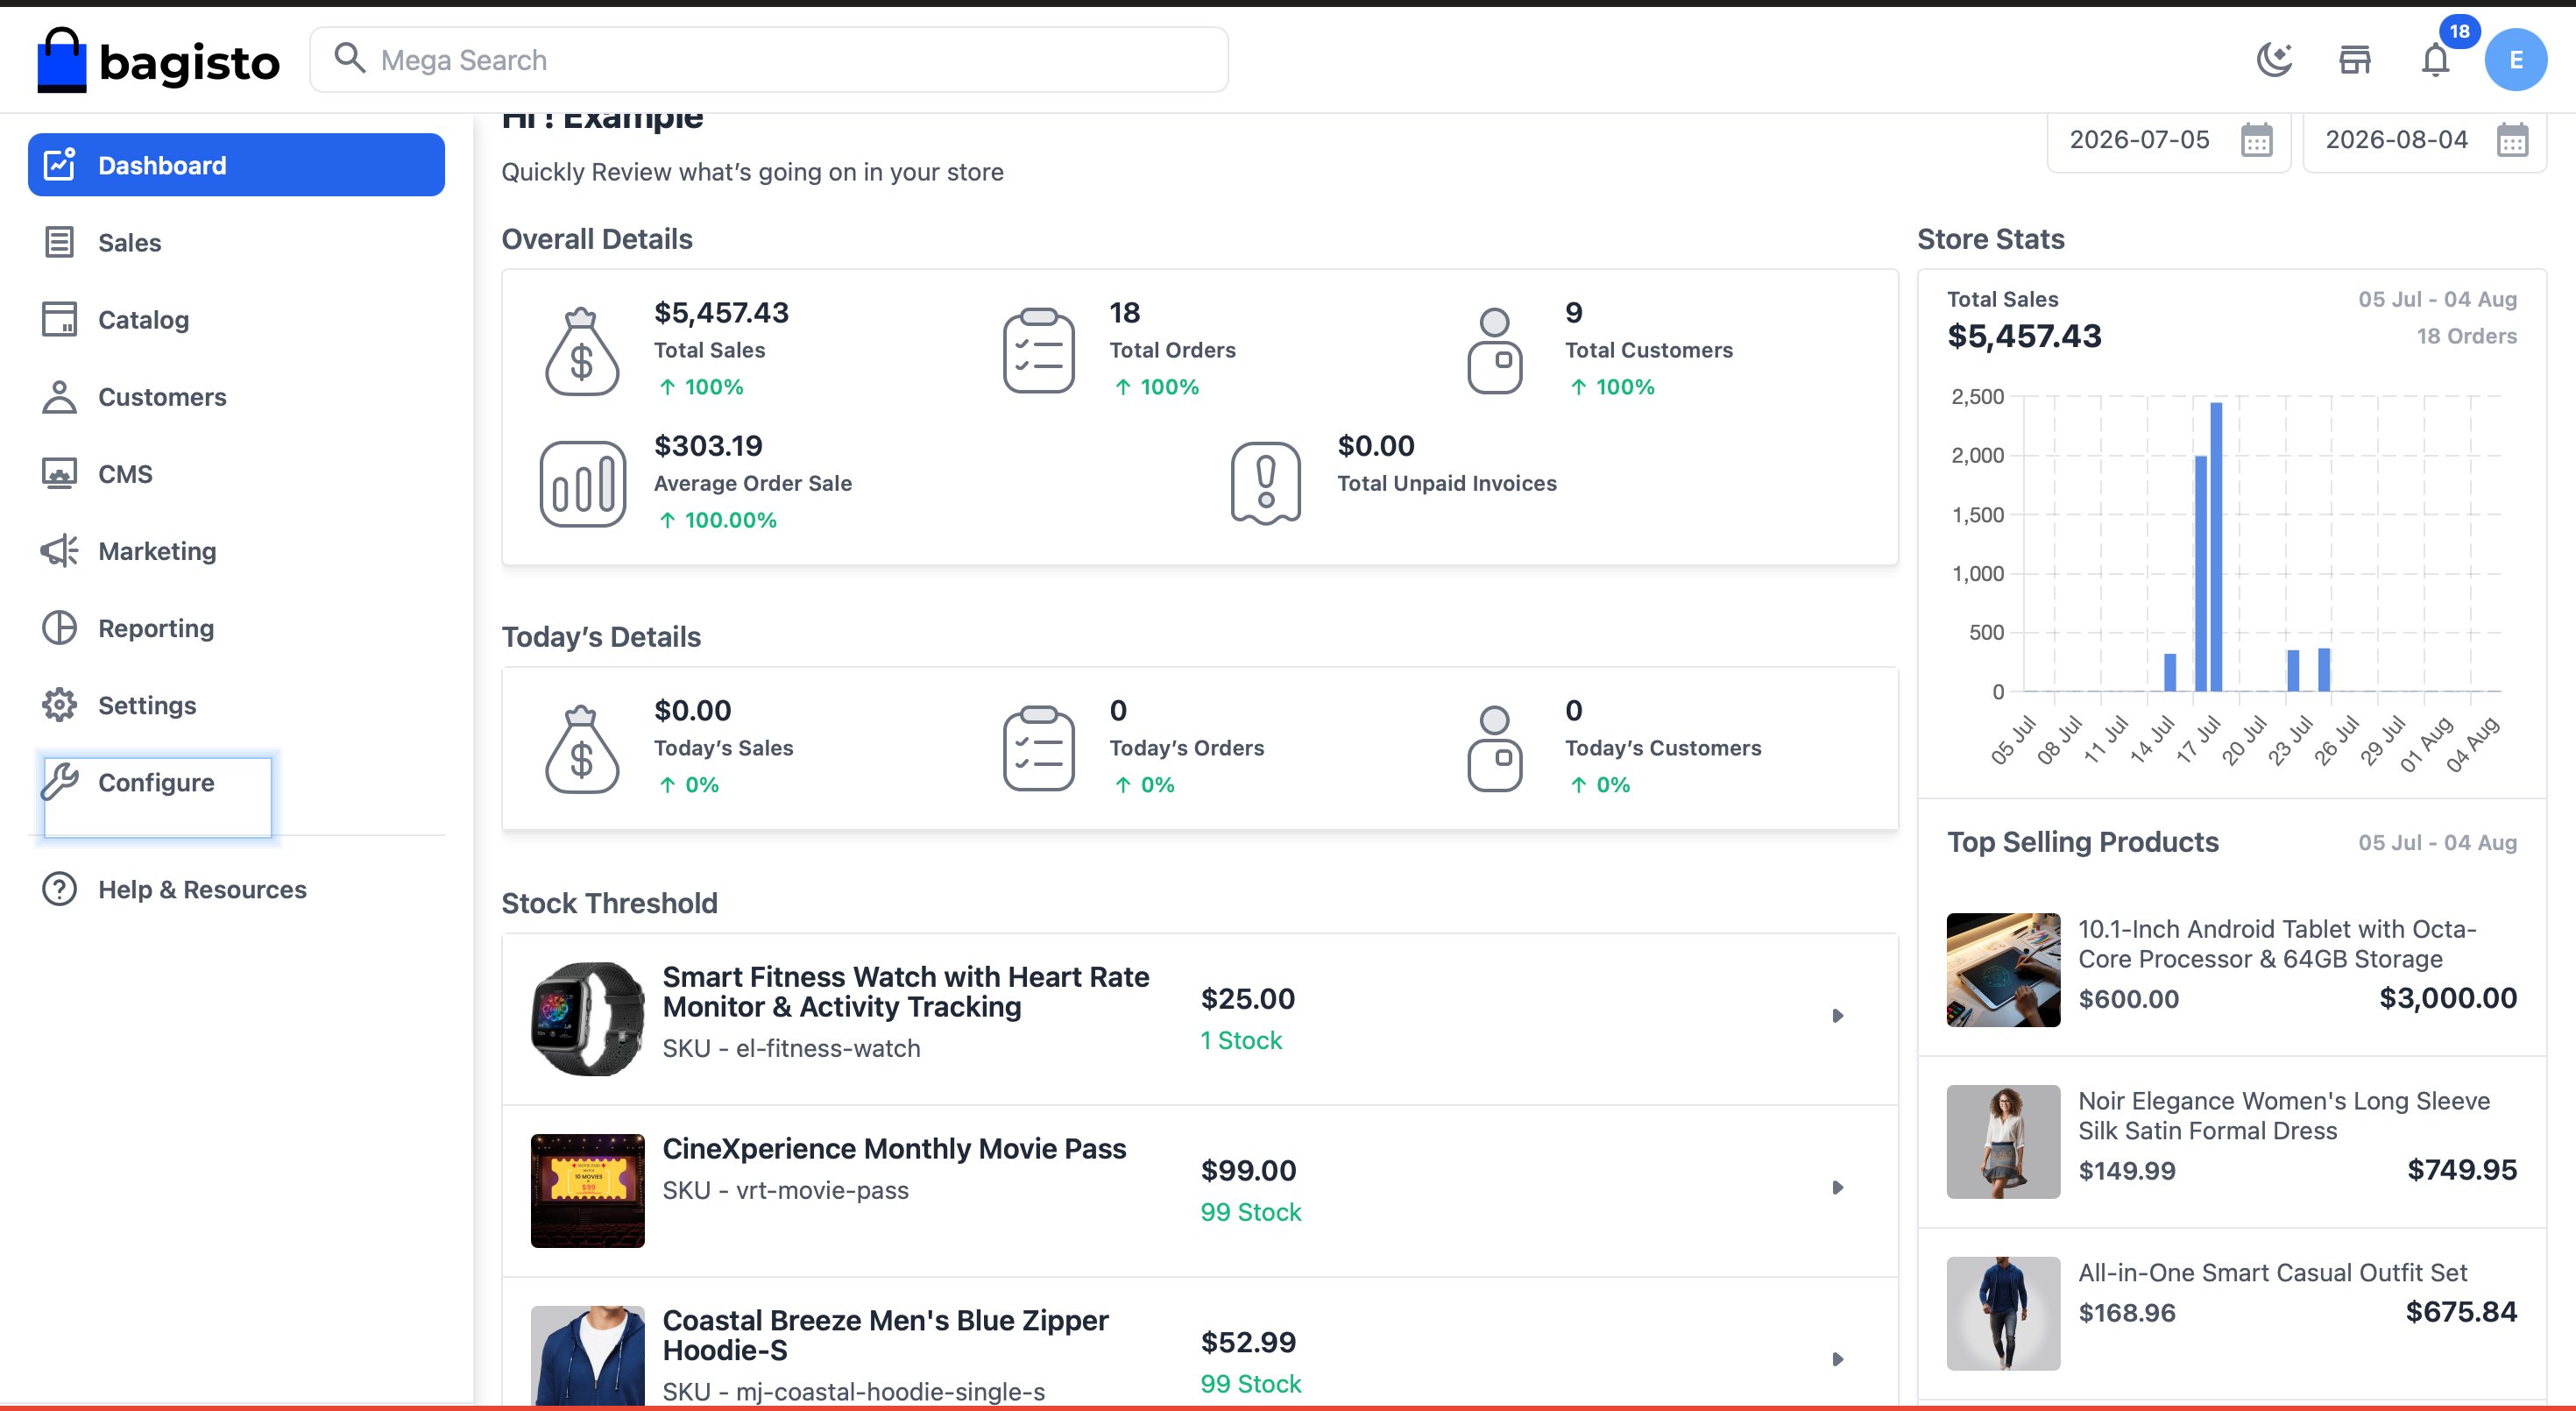
### Step 1: Navigate to Configure
Log in to your Bagisto admin panel and click **Configure** from the left sidebar.
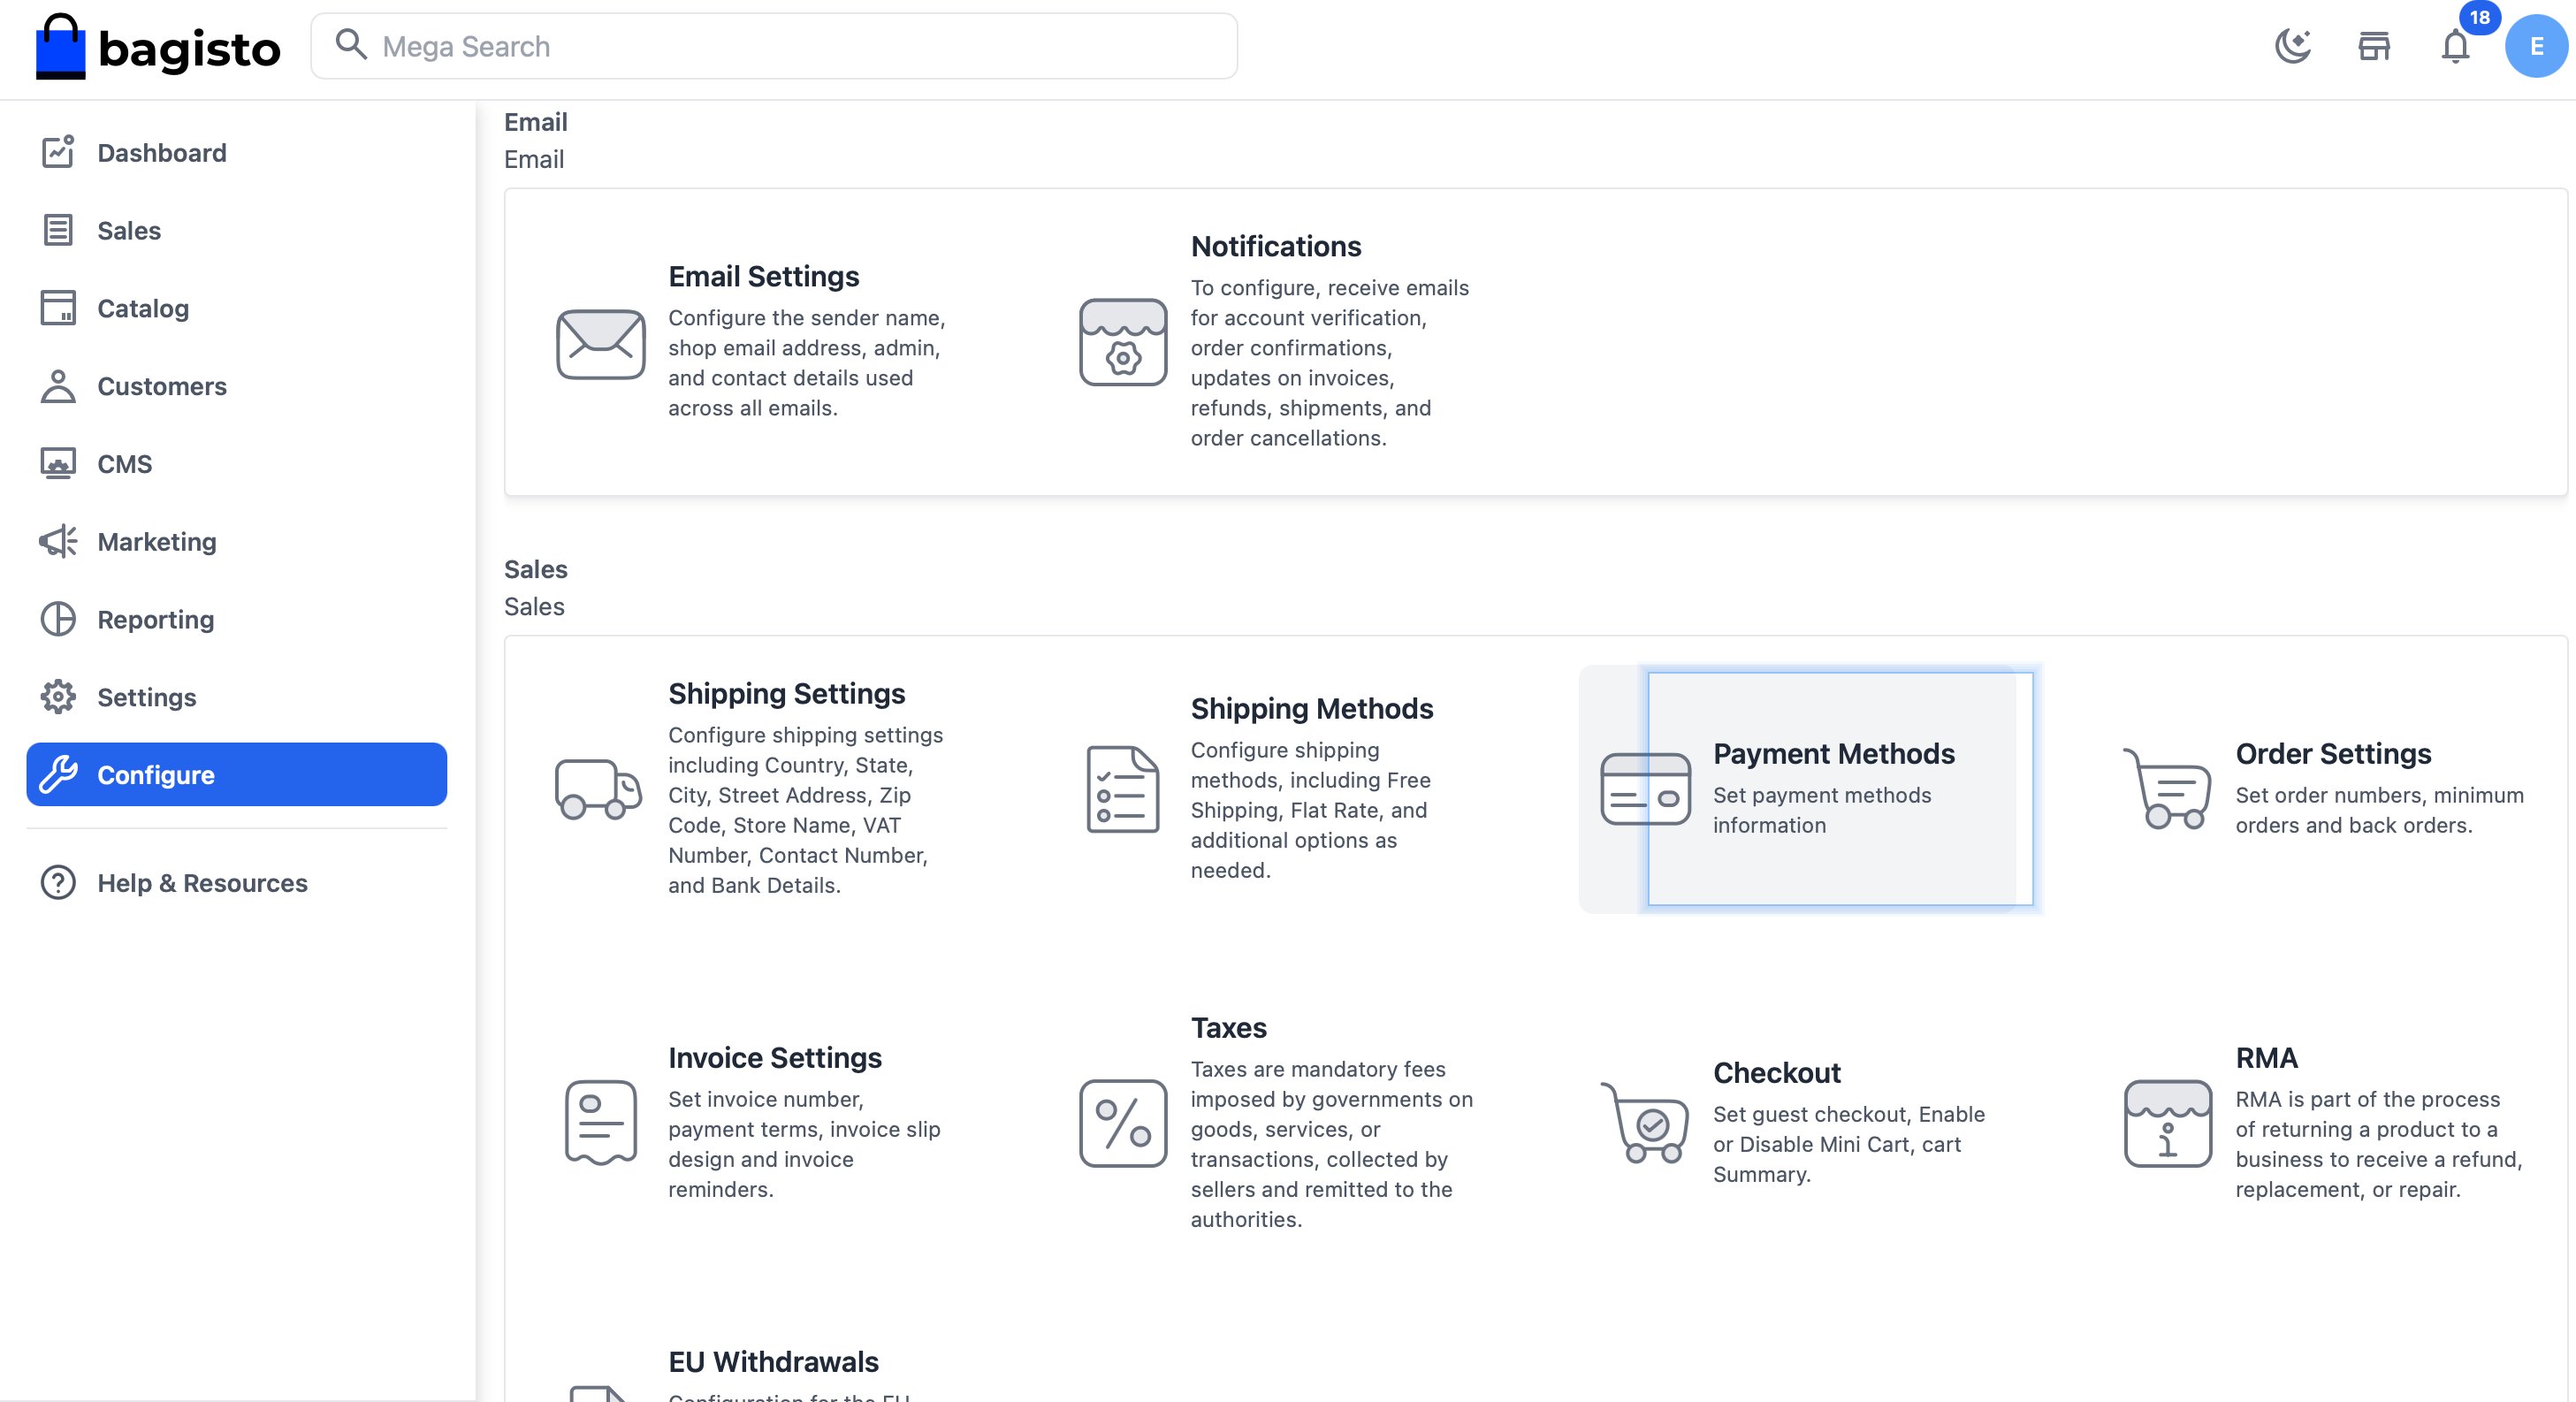
### Step 2: Open Payment Methods
Scroll down to the **Sales** section and click on **Payment Methods**.
### Step 3: Configure PayGlocal
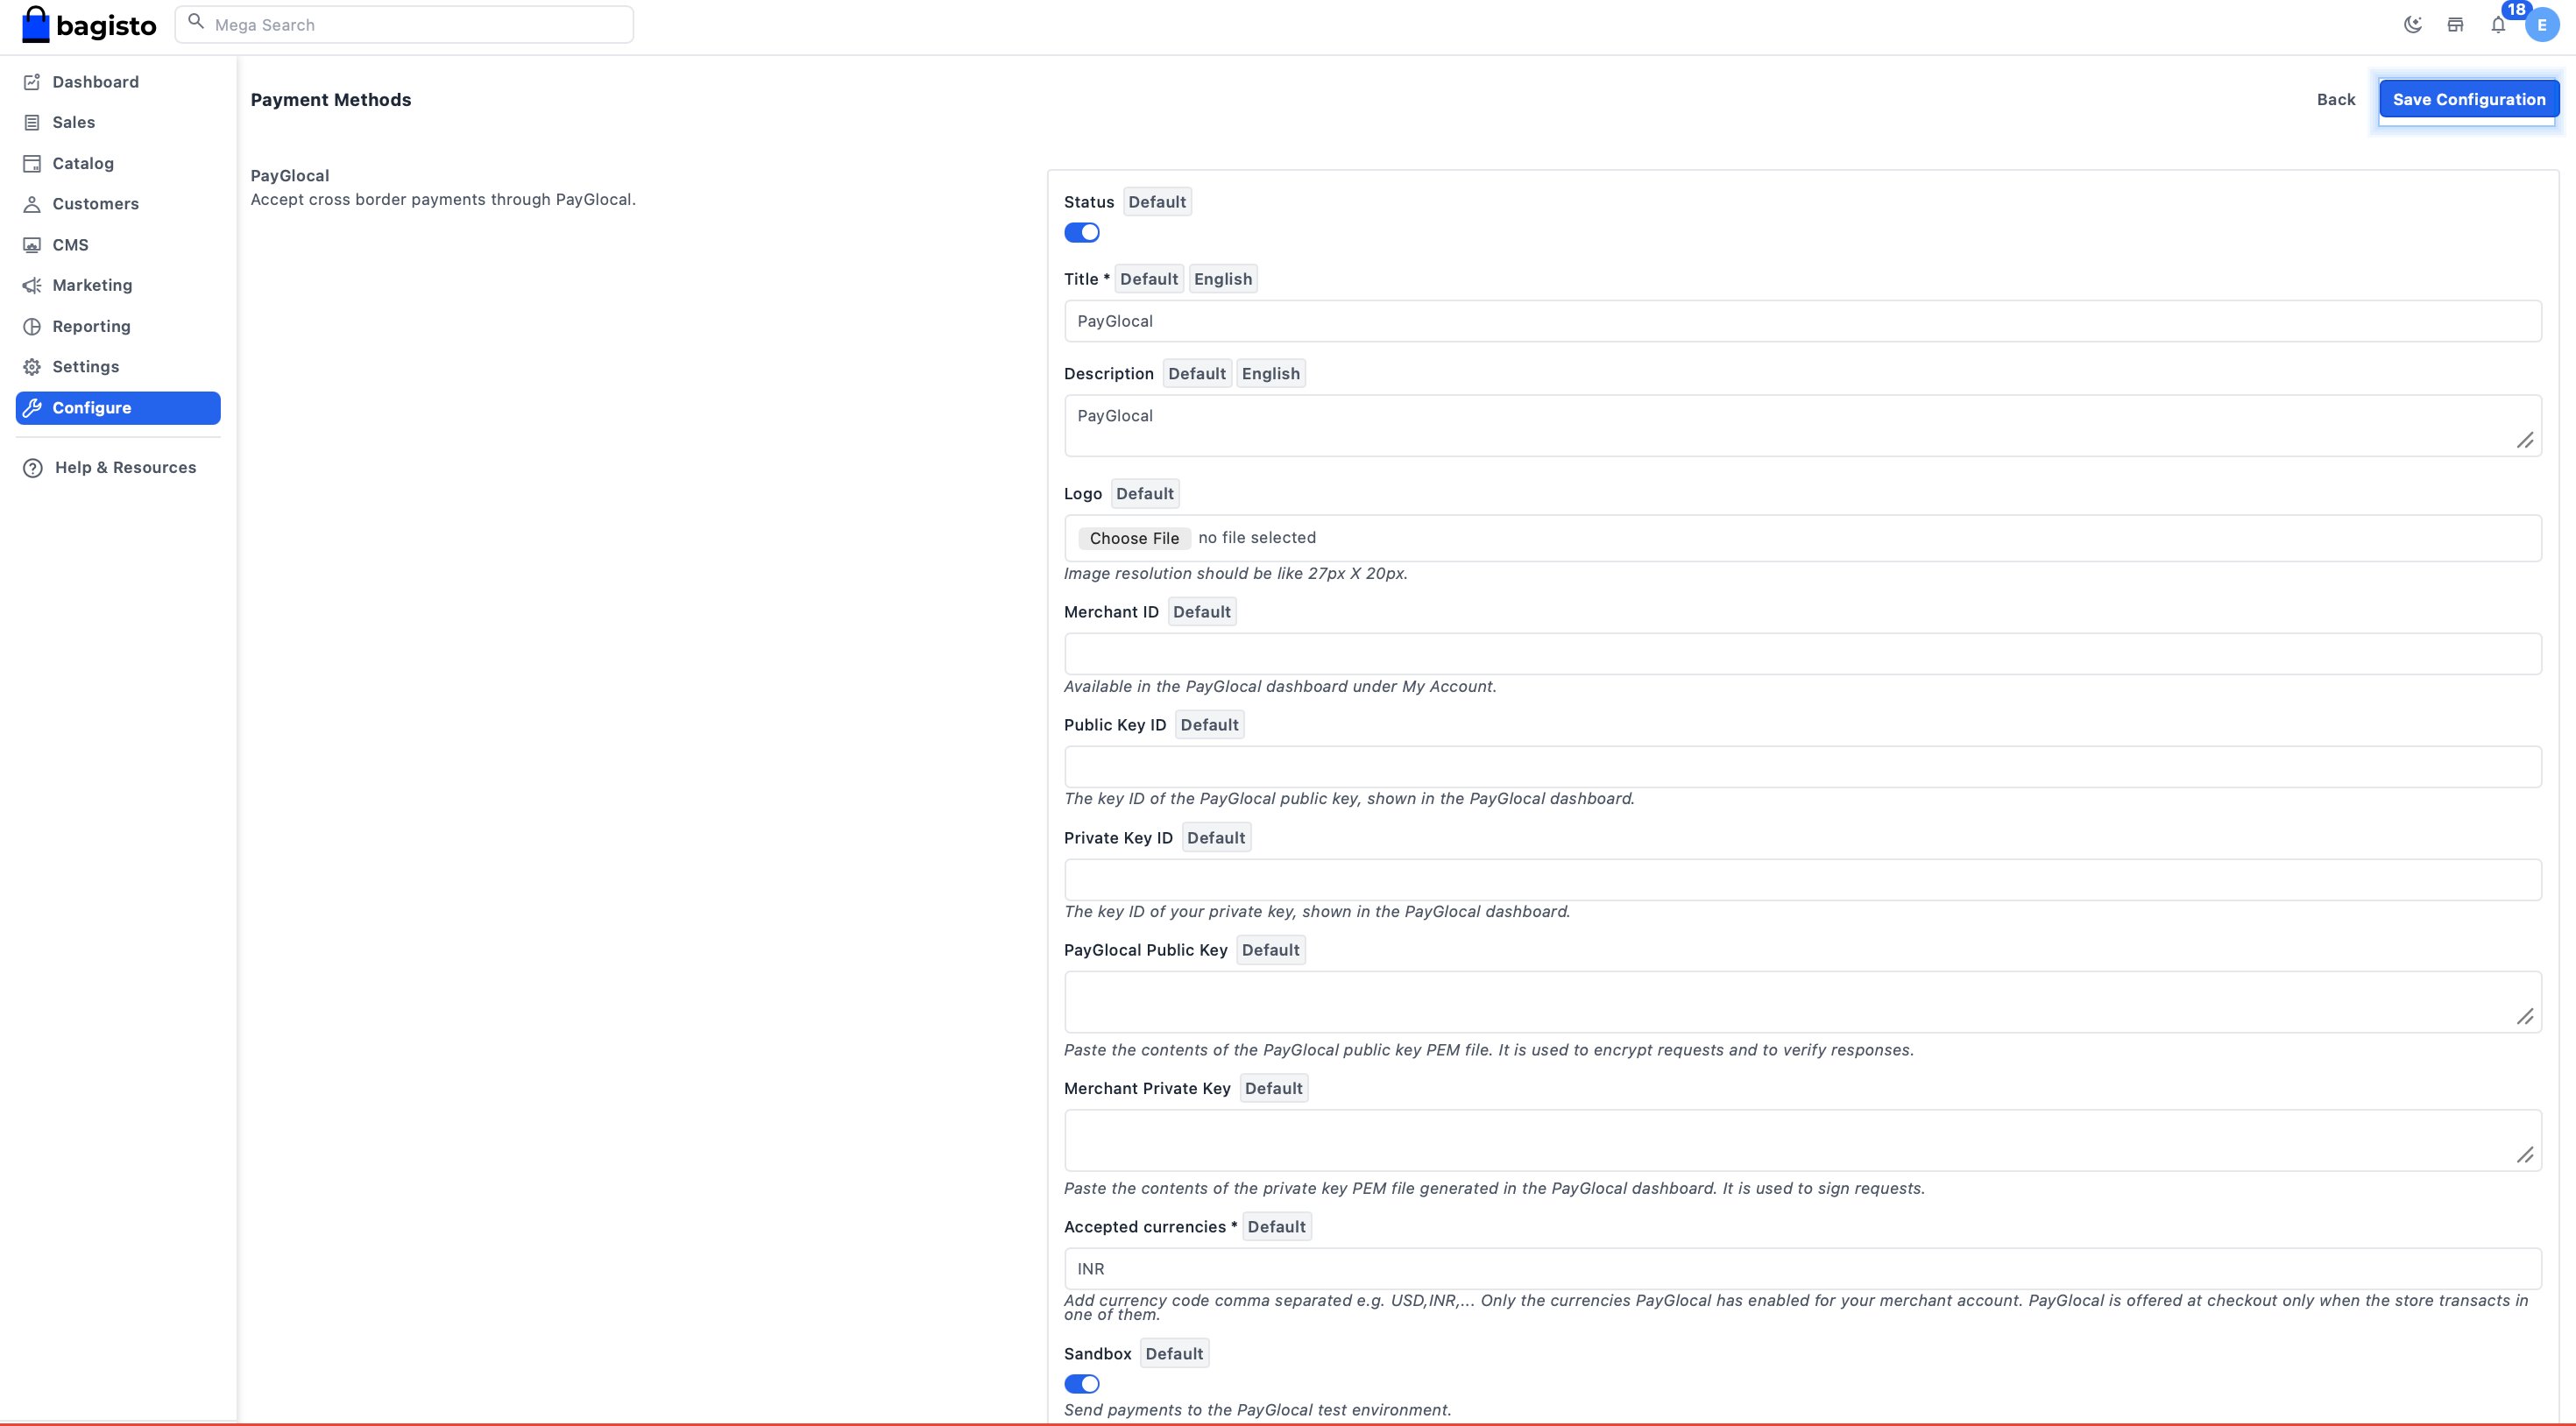
In the Payment Methods page, locate **PayGlocal** and configure the following:
1. Toggle the **Status** switch to enable PayGlocal
2. Fill in your merchant credentials (see Field Reference below)
3. Click **Save Configuration** in the top-right corner
## Field Reference
| Field | Description |
| ------------------------ | ------------------------------------------------------------------------------------------------------- |
| **Status** | Enable or disable the PayGlocal payment gateway. |
| **Title** | Display name for PayGlocal shown to customers at checkout (e.g., "PayGlocal"). |
| **Description** | Payment method description displayed to customers on the checkout page. |
| **Logo** | Optional logo image for the payment method (recommended: 27px x 20px). |
| **Merchant ID** | Your Merchant ID from the PayGlocal dashboard, visible under My Account. |
| **Public Key ID** | The Public Key ID provided by PayGlocal, shown in the PayGlocal dashboard. |
| **Private Key ID** | The Private Key ID of your private key, shown in the PayGlocal dashboard. |
| **PayGlocal Public Key** | Paste the contents of the PayGlocal public key PEM file. Used to encrypt requests and verify responses. |
| **Merchant Private Key** | Paste the contents of your merchant private key PEM file. Used to sign requests. |
| **Accepted Currencies** | Comma-separated currency codes enabled for your merchant account (e.g., "INR" or "USD,INR"). |
| **Sandbox** | Toggle to send payments to the PayGlocal test environment. Disable for production. |
For details on fetching your Merchant ID, keys, and PEM files, refer to the [Key Management](/getting-started/dashboard-and-key-management) section.
## Go Live
Before accepting real customer payments:
1. Ensure **Sandbox** mode is turned **off** in the PayGlocal configuration
2. Verify all credentials are from your production PayGlocal account
3. Test a transaction on your storefront to confirm the integration is working
**Setup Successful** - After following the steps above, your Bagisto store is ready to accept cross-border payments from customers using PayGlocal.