> ## Documentation Index
> Fetch the complete documentation index at: https://docs.payglocal.in/llms.txt
> Use this file to discover all available pages before exploring further.
# OpenCart
> Accept payments on your OpenCart store using PayGlocal — download, install, and configure in minutes.
## What is OpenCart?
OpenCart is an open-source and free eCommerce platform, which is easy to set up and is used by thousands of merchants around the world. The eCommerce platform features plenty of free themes and extensions that add more functionalities and features to the store.
## OpenCart with PayGlocal
Integrating PayGlocal with OpenCart enables online merchants to accept online payments through internet banking and debit/credit cards from customers. The extension makes it easier for merchants to accept payments through the PayGlocal payment gateway.
Before following the steps below, ensure you have a **PayGlocal merchant account**. [Contact us](mailto:support@payglocal.in) to create one.
## Plugin Download
Download the extension based on your OpenCart and PHP version. If you are not able to see the download link for your version, kindly reach out to your account manager.
| OpenCart Version | PHP Version | Download |
| ---------------- | ----------- | ----------------------------------------------------------------------- |
| 1.5 – 5.6 | Any | [Download](mailto:support@payglocal.in?subject=OpenCart%20Plugin%201.5) |
| 2.3 | Any | [Download](mailto:support@payglocal.in?subject=OpenCart%20Plugin%202.3) |
| 3.0 | Any | [Download](mailto:support@payglocal.in?subject=OpenCart%20Plugin%203.0) |
## Plugin Installation
Log in to your OpenCart admin panel and go to **Extensions → Extension Installer**.
Upload the extension file that was downloaded.
Click the **Continue** button once the upload is completed.
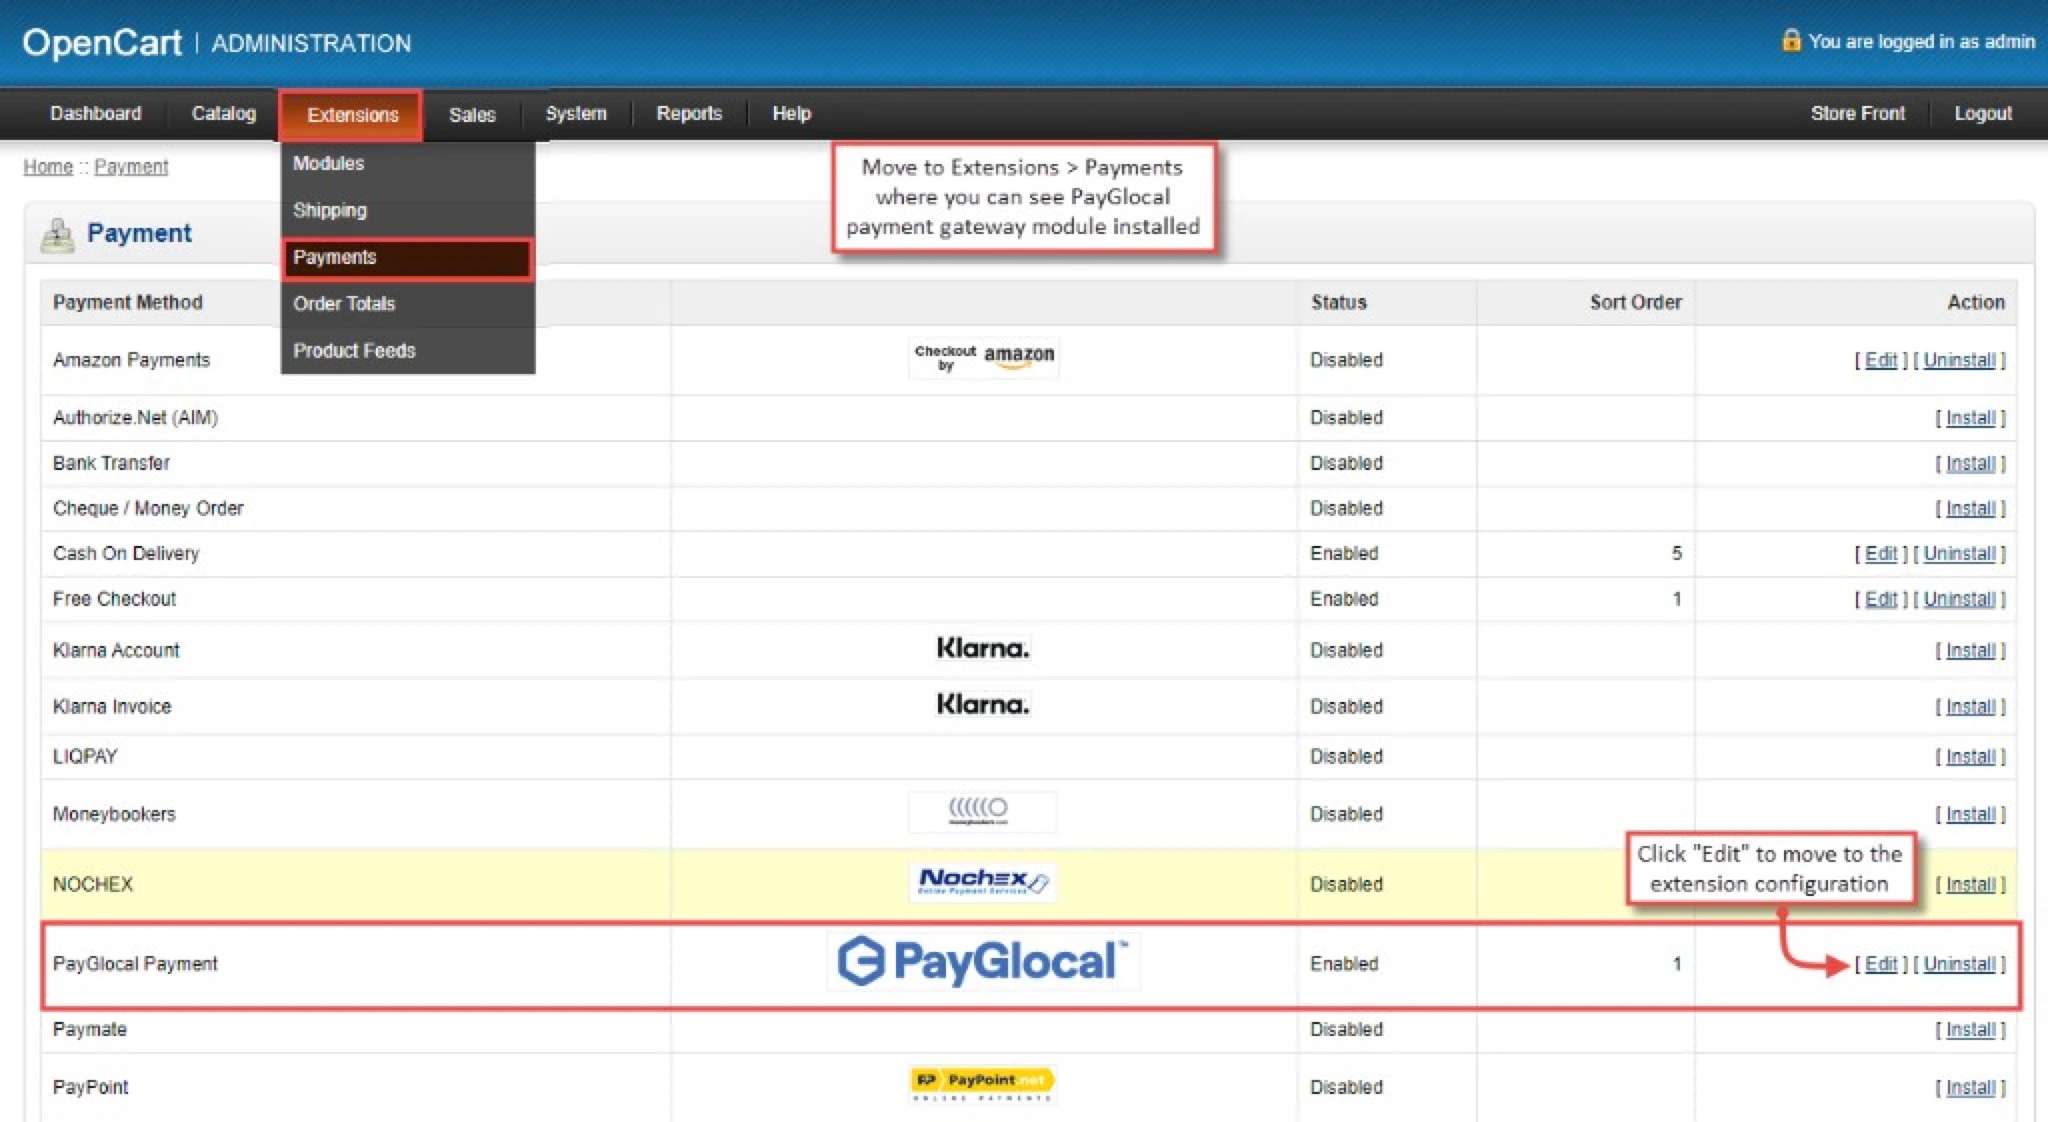
Navigate to **Extensions → Extensions**, select **Payments** from the drop-down, and install the PayGlocal Payment Gateway extension.
## Configuration
Log in to your OpenCart admin panel and navigate to **Extensions → Extensions**. Select **Payments** from the drop-down. Click the **Edit** option against the PayGlocal Payment Gateway to configure it.
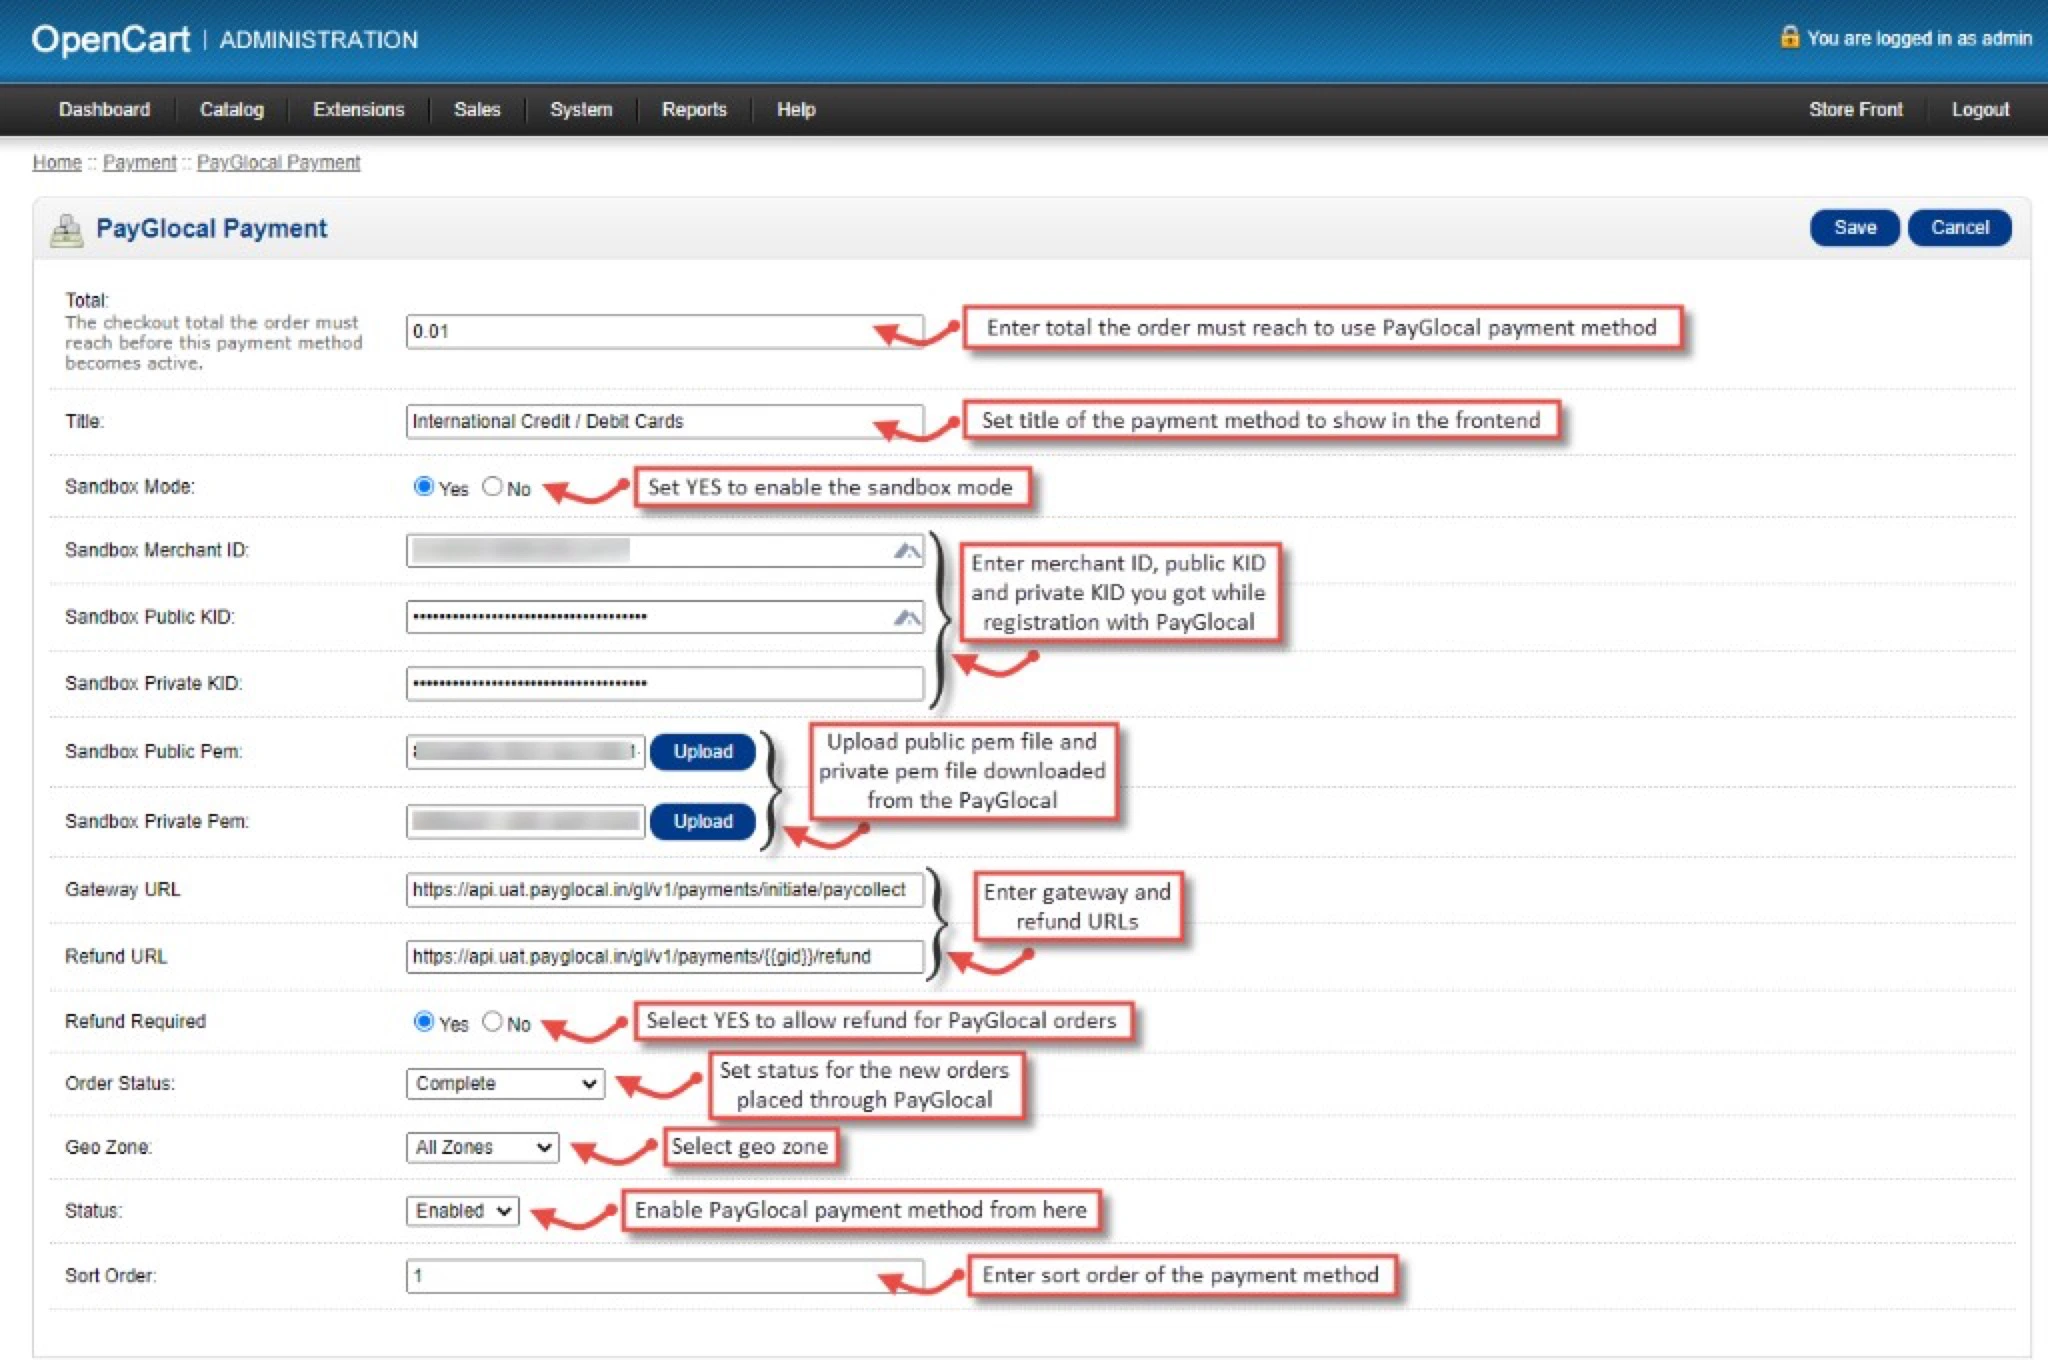
Configure the extension as described in the table below.
### Field Reference
| Field | Description |
| ------------------- | -------------------------------------------------------------------------------------------- |
| **Total** | Enter the minimum order total required for customers to use the PayGlocal payment method. |
| **Title** | Enter a custom title for the payment method shown to customers on the frontend. |
| **Sandbox Mode** | Enable or disable sandbox mode as per your requirements. |
| **Merchant ID** | Enter your Merchant ID from the PayGlocal dashboard — visible in the top bar when logged in. |
| **Public Key** | Enter the PayGlocal public key from the merchant account dashboard. |
| **Private Key** | Enter the PayGlocal private key from the merchant account dashboard. |
| **Public PEM** | Upload the public PEM file downloaded from the PayGlocal merchant account dashboard. |
| **Private PEM** | Upload the private PEM file downloaded from the PayGlocal merchant account dashboard. |
| **Gateway URL** | Enter: `https://api.uat.payglocal.in/gl/v1/payments/initiate/paycollect` |
| **Refund URL** | Enter: `https://api.uat.payglocal.in/gl/v1/payments/{gid}/refund` |
| **Refund Required** | Select **Yes** to allow refund functionality for payments made through PayGlocal. |
| **Order Status** | Set the default status of orders paid using PayGlocal. |
| **Geo Zone** | Select the applicable geographical zone for allowing the payment method. |
| **Status** | Enable or disable the PayGlocal payment method from here. |
| **Sort Order** | In case of multiple payment methods, enter the sort order of the PayGlocal payment gateway. |
For details on fetching your Merchant ID, keys, and PEM files, refer to the [Key Management](/getting-started/dashboard-and-key-management) section.
Click the **Save** button at the top-right corner of the page.
**Setup Successful** — Once you have followed all the steps above, the PayGlocal payment gateway is successfully set up with your OpenCart store.