> ## Documentation Index
> Fetch the complete documentation index at: https://docs.payglocal.in/llms.txt
> Use this file to discover all available pages before exploring further.

# Wix

> Accept payments on your Wix store using PayGlocal — set up the plugin via Velo Dev Mode.

## PayGlocal × Wix

Integrating PayGlocal with Wix enables merchants to accept online payments from their customers on the Wix platform. The plugin makes it easier for merchants to accept payments through the PayGlocal payment gateway.

<Note>
  Before following the steps below, ensure you have a **PayGlocal merchant account**. [Contact us](mailto:support@payglocal.in) to create one.
</Note>

## Installation Steps

### Step 1 — Log in to Your Wix Site

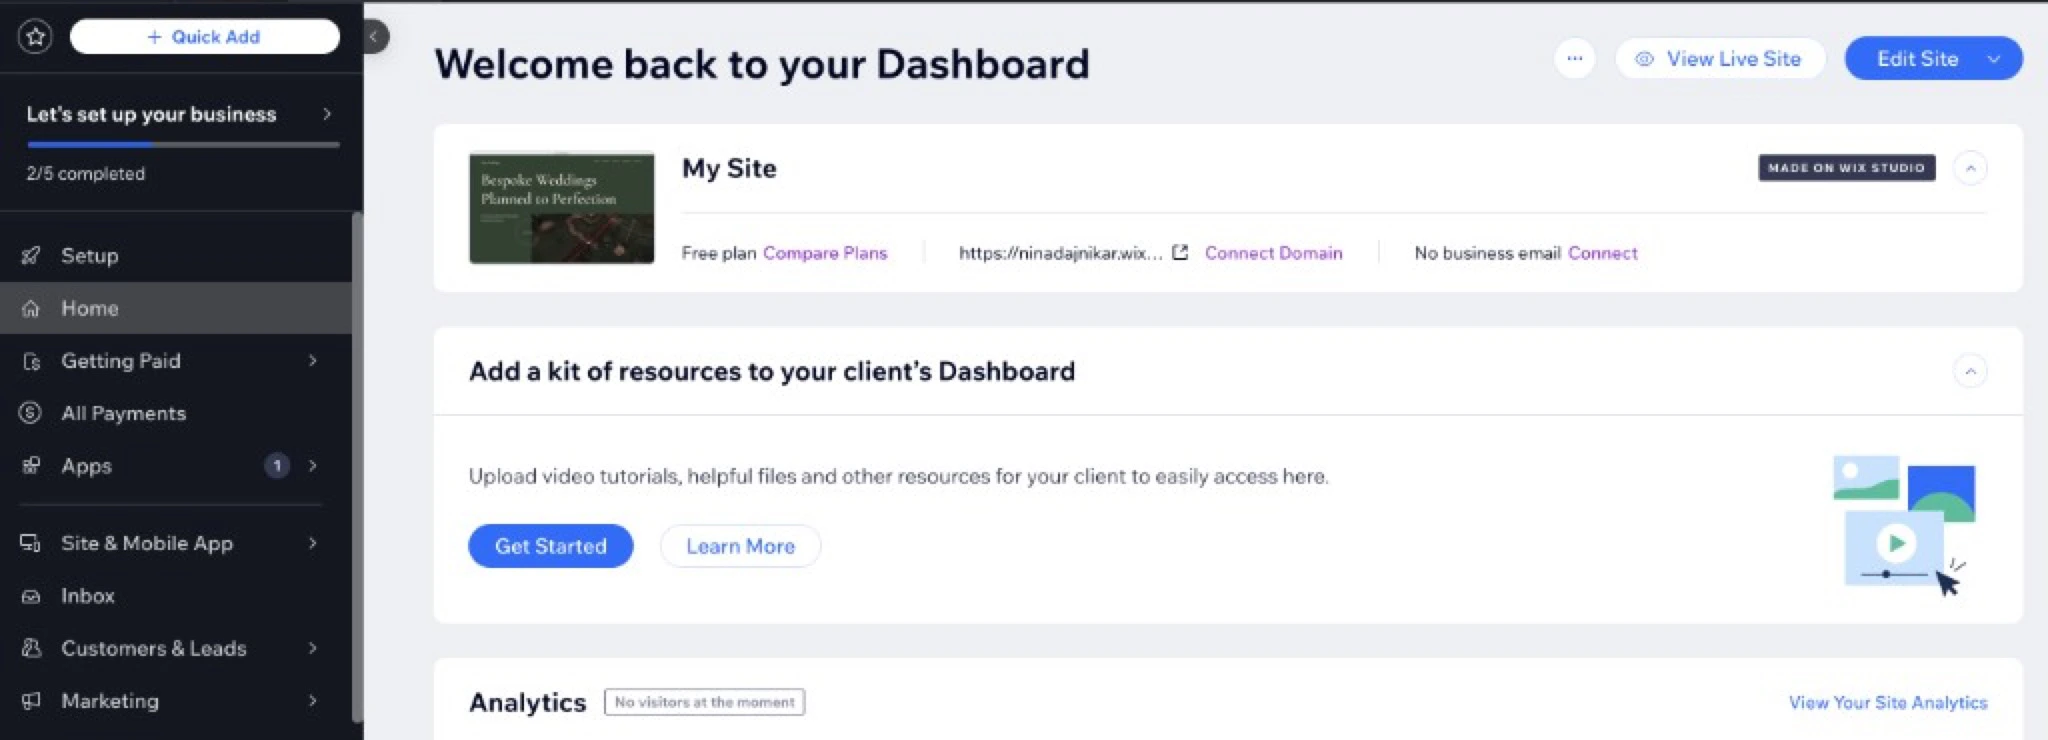
Log in to your Wix account and select the site on which you need to install the PayGlocal plugin. Click the **Edit Site** button (top-right) from your dashboard.

<div className="payg-screenshot-tile payg-screenshot-tile--zoom payg-screenshot-tile--hq">
  <img src="https://mintcdn.com/payglocal/gXgve7lEqiVYdq6T/images/plugins/wix-dashboard.png?fit=max&auto=format&n=gXgve7lEqiVYdq6T&q=85&s=afae7f55d2d2e969e5bdc15c86cd367b" alt="Wix Dashboard — click Edit Site" width="2048" height="740" data-path="images/plugins/wix-dashboard.png" />
</div>

***

### Step 2 — Enable Dev Mode

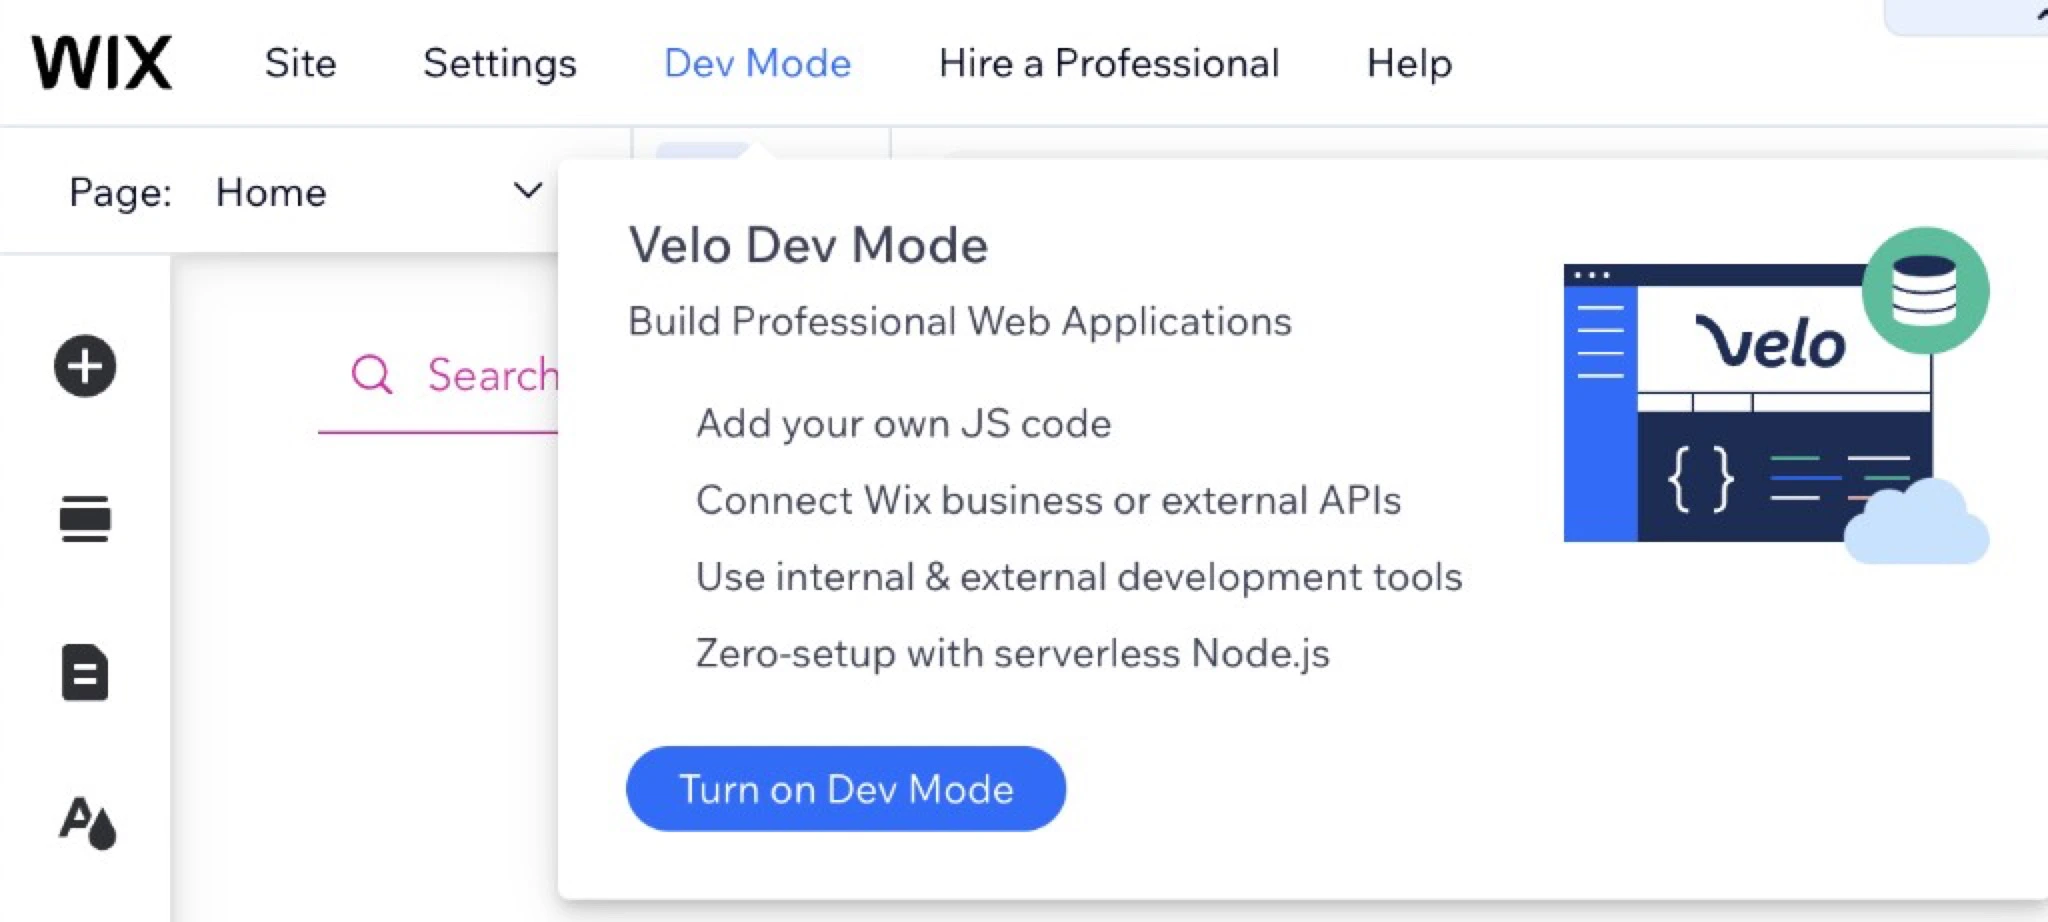
From the Wix editor top bar, go to **Dev Mode** and click **Turn on Dev Mode** to enable Velo.

<div className="payg-screenshot-tile payg-screenshot-tile--zoom payg-screenshot-tile--hq">
  <img src="https://mintcdn.com/payglocal/gXgve7lEqiVYdq6T/images/plugins/wix-dev-mode.png?fit=max&auto=format&n=gXgve7lEqiVYdq6T&q=85&s=9e360d042663078c164bb4970db1edce" alt="Wix Velo Dev Mode panel" width="2048" height="922" data-path="images/plugins/wix-dev-mode.png" />
</div>

***

### Step 3 — Plugin Directory Structure

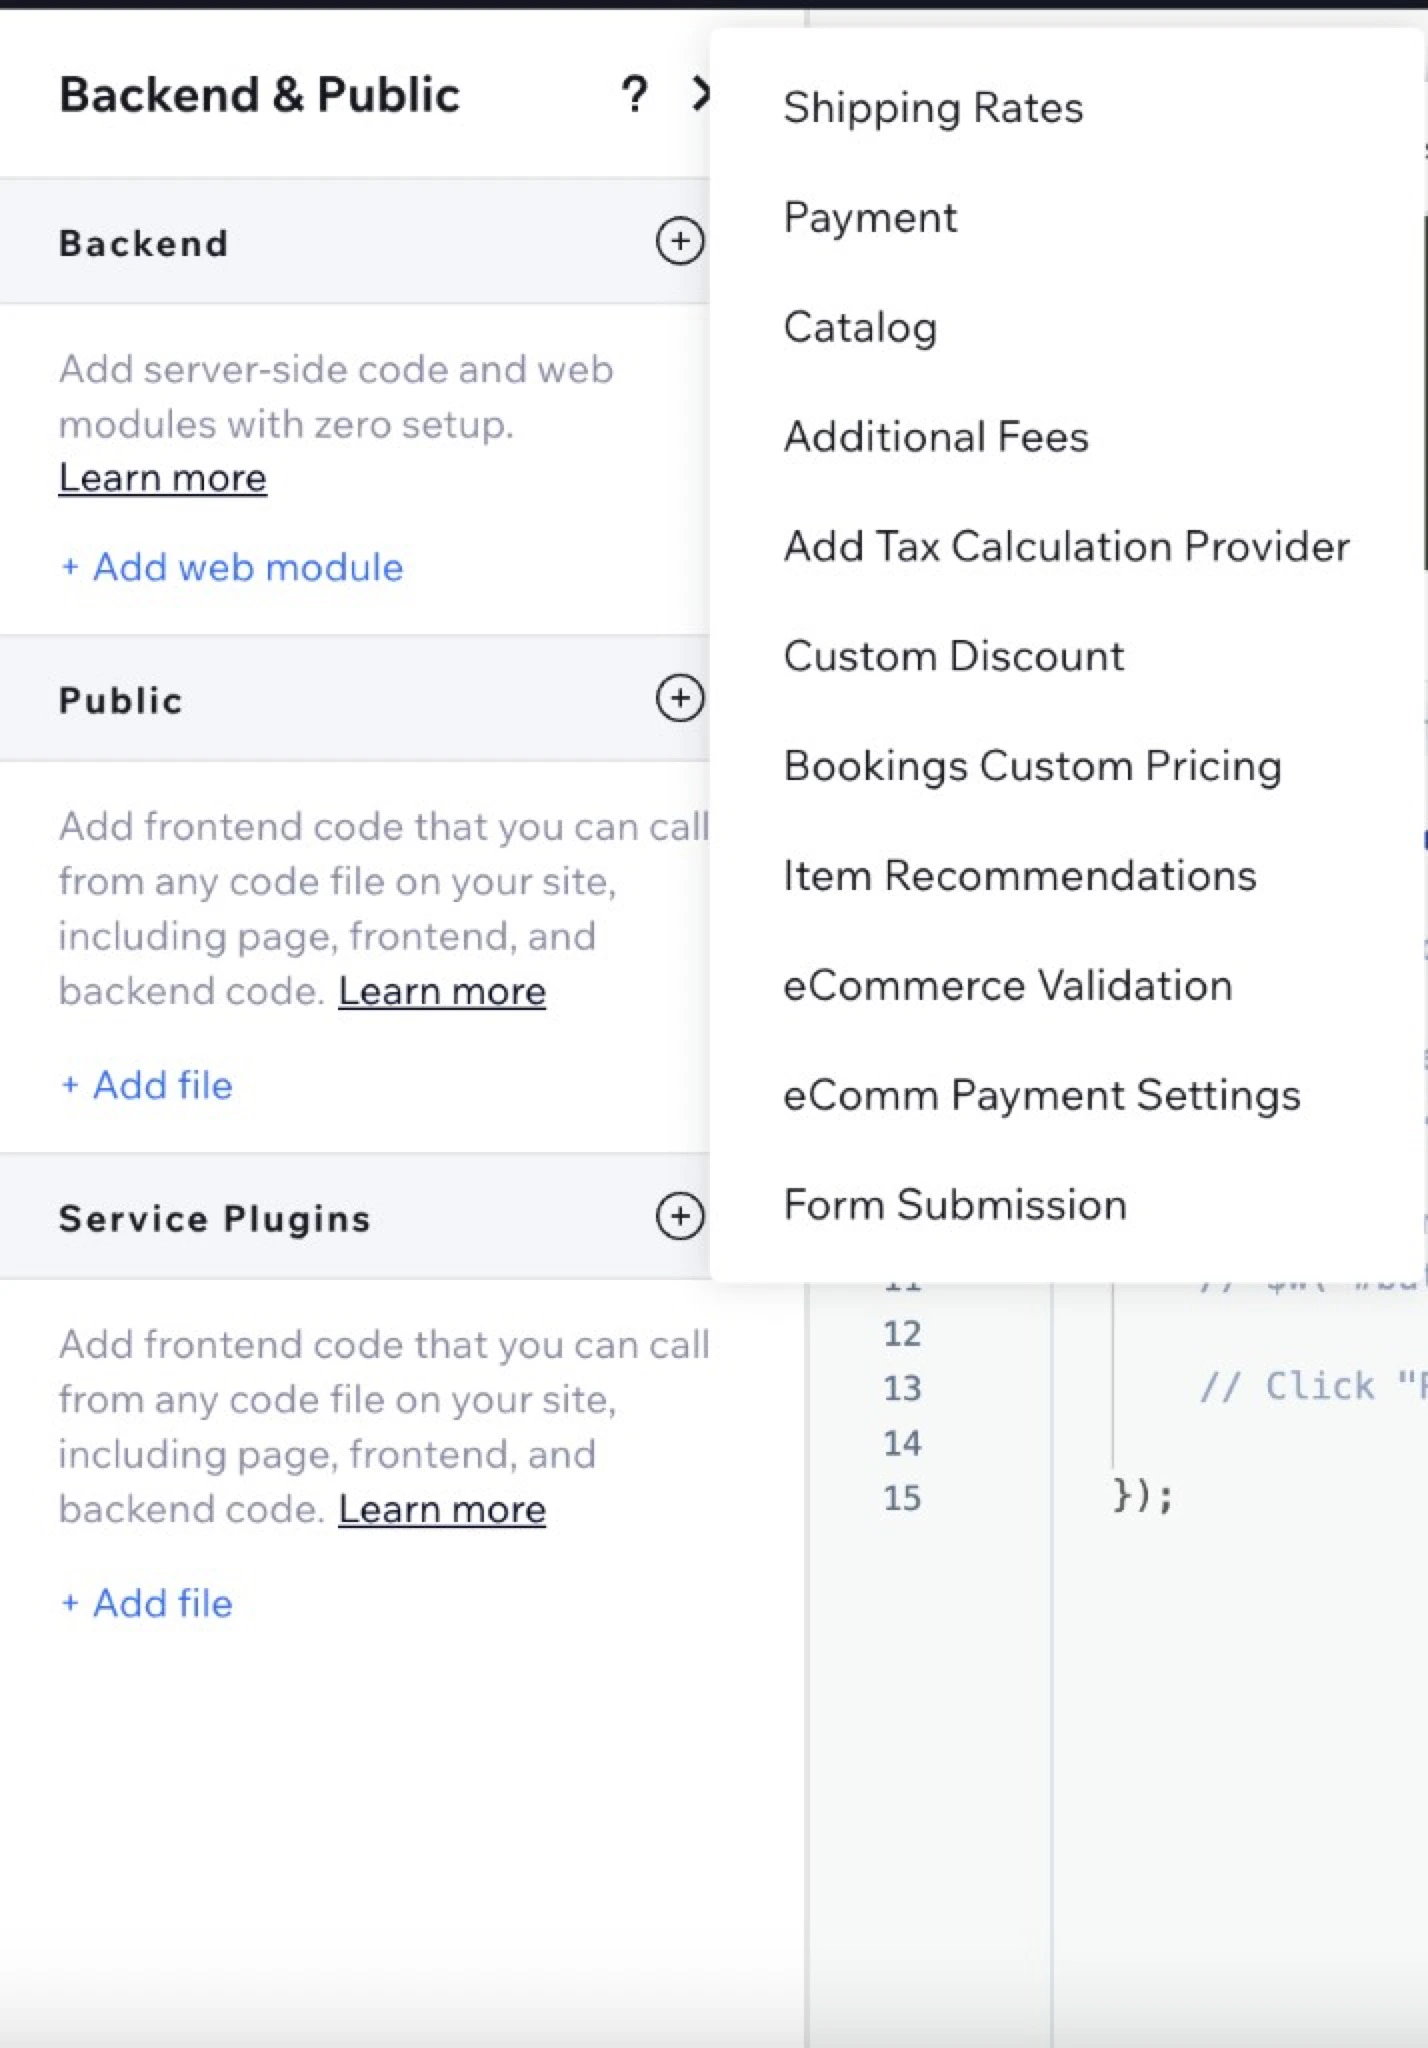
Inside the **Service Plugins** directory, click the **+** (Add) icon and select **Payment** from the list.

<div className="payg-screenshot-tile payg-screenshot-tile--zoom payg-screenshot-tile--hq">
  <img src="https://mintcdn.com/payglocal/gXgve7lEqiVYdq6T/images/plugins/wix-service-plugins-payment.png?fit=max&auto=format&n=gXgve7lEqiVYdq6T&q=85&s=828fb0d8efd840f5704c7c5e4aa48a11" alt="Service Plugins panel with Payment option" width="1428" height="2048" data-path="images/plugins/wix-service-plugins-payment.png" />
</div>

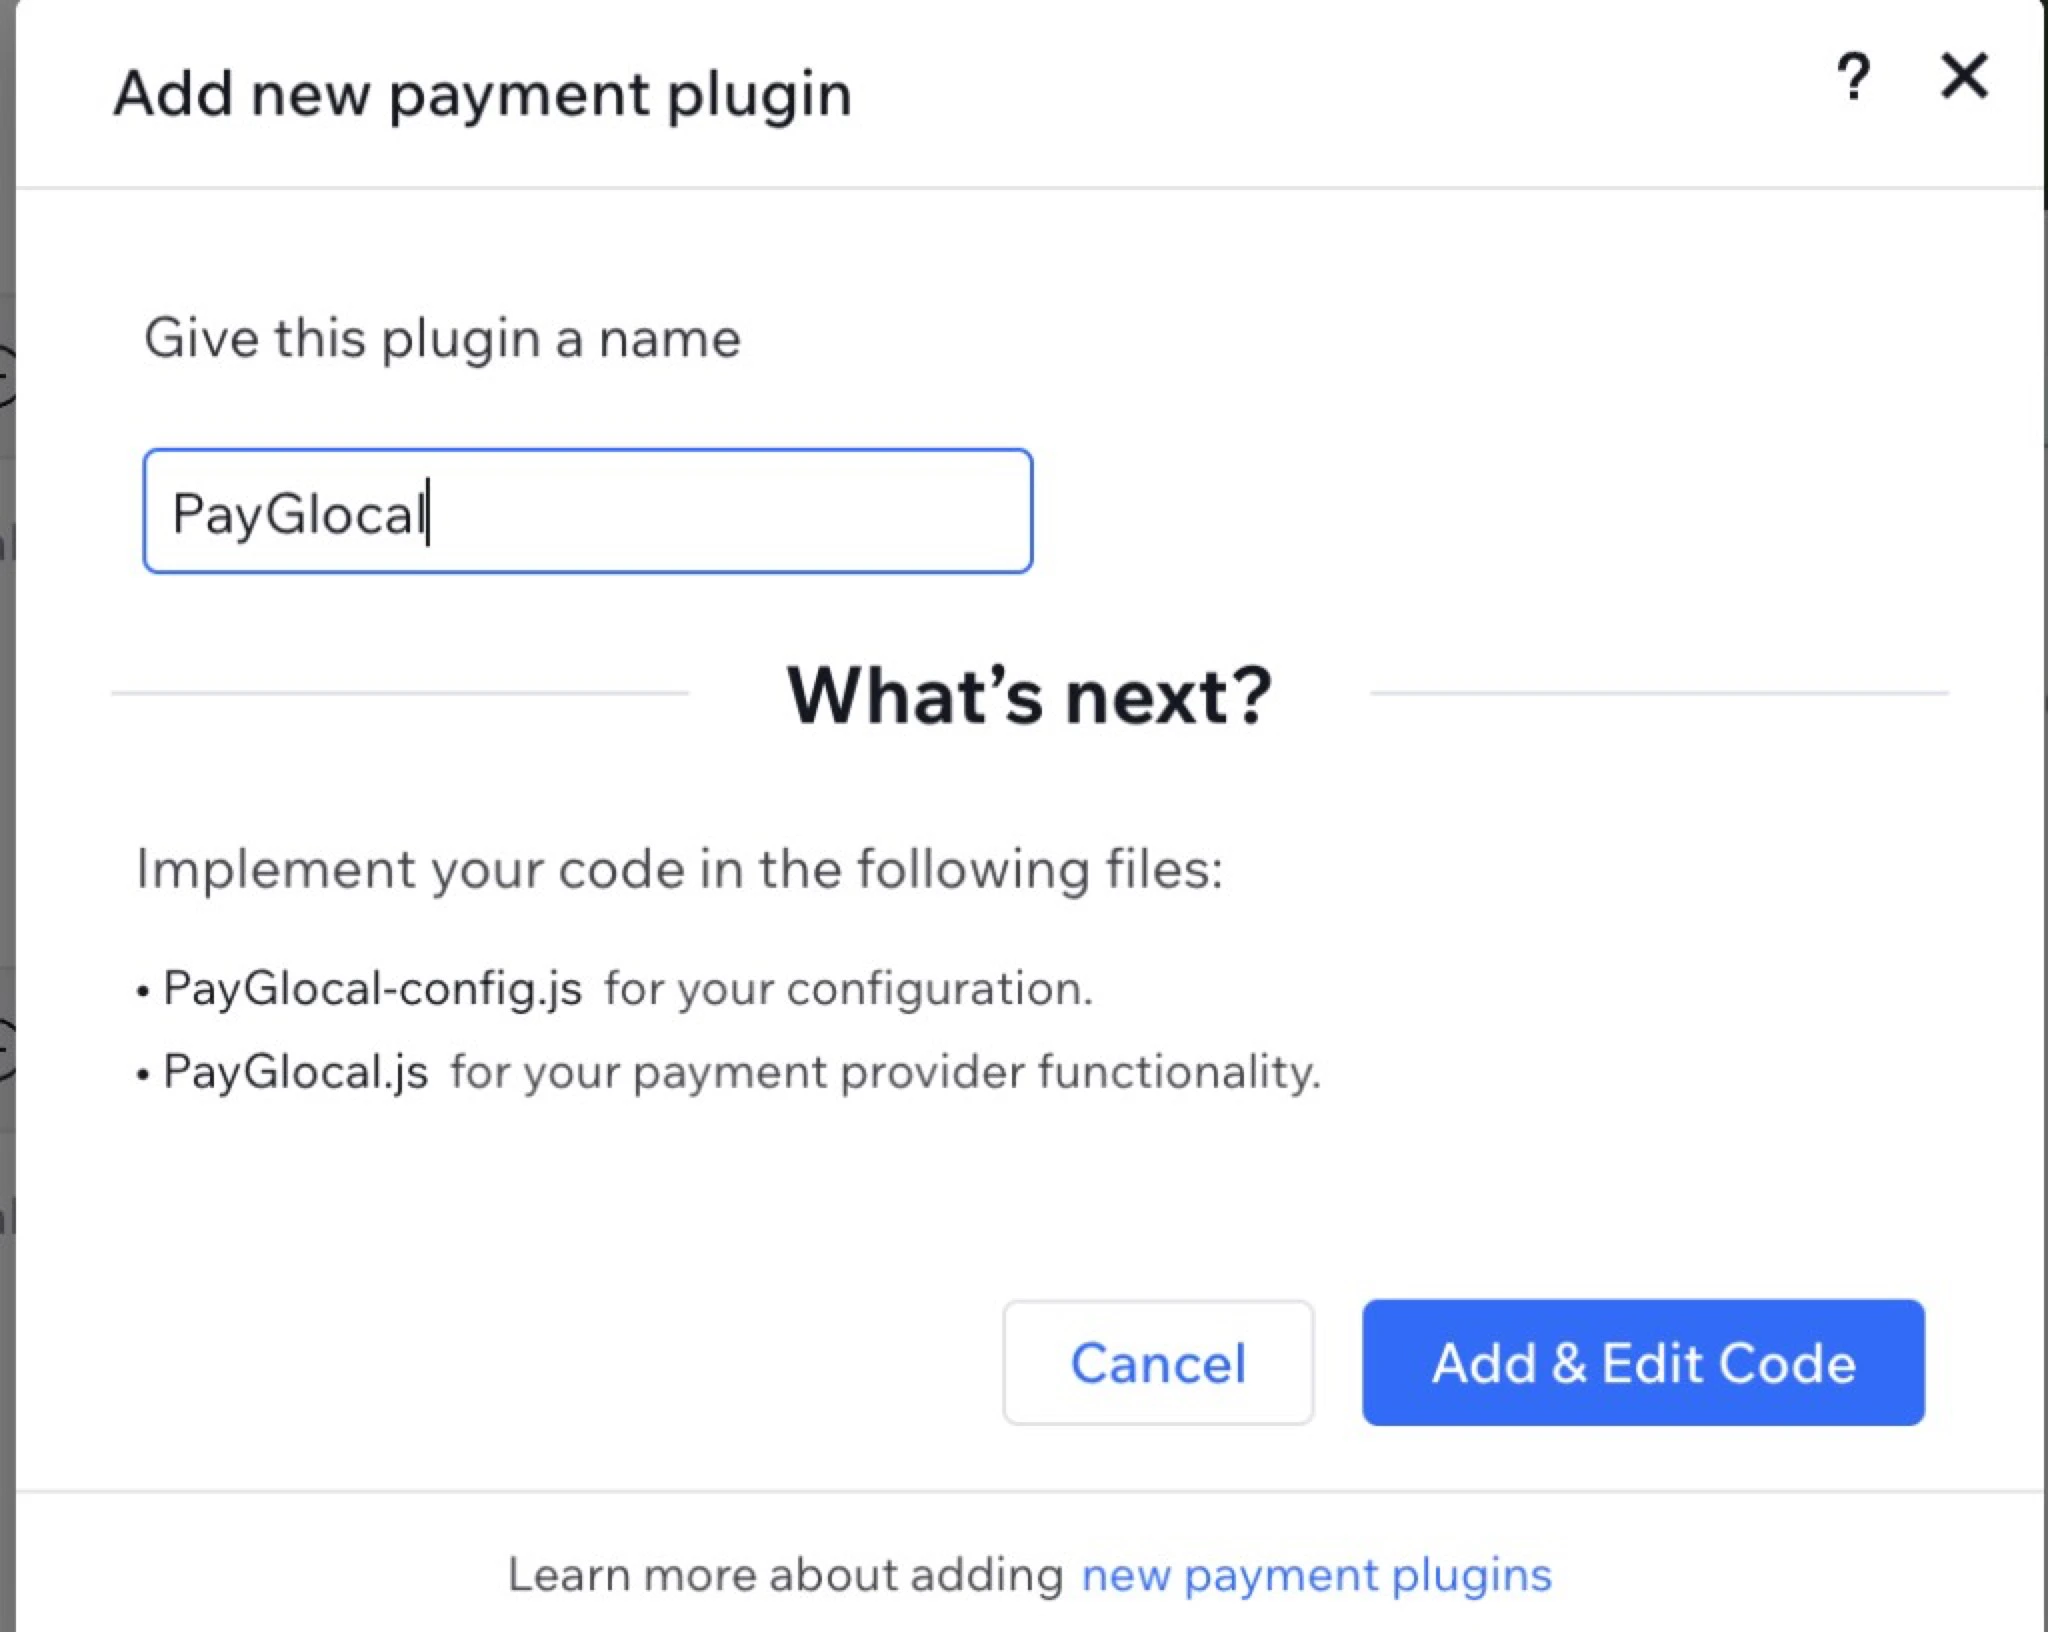
Enter the plugin name as **PayGlocal**. Two files will be created automatically:

* `PayGlocal.js`
* `PayGlocal-config.js`

<div className="payg-screenshot-tile payg-screenshot-tile--zoom payg-screenshot-tile--hq">
  <img src="https://mintcdn.com/payglocal/gXgve7lEqiVYdq6T/images/plugins/wix-add-payment-plugin-modal.png?fit=max&auto=format&n=gXgve7lEqiVYdq6T&q=85&s=489b0f2199dc05236e63927edfe3f138" alt="Add new payment plugin modal with PayGlocal name" width="2048" height="1632" data-path="images/plugins/wix-add-payment-plugin-modal.png" />
</div>

<Note>
  Replace the contents in both files by copying the code from the repository: [PayGlocal-Plugin-Wix-Github](https://github.com/PayGlocal-Technologies)
</Note>

***

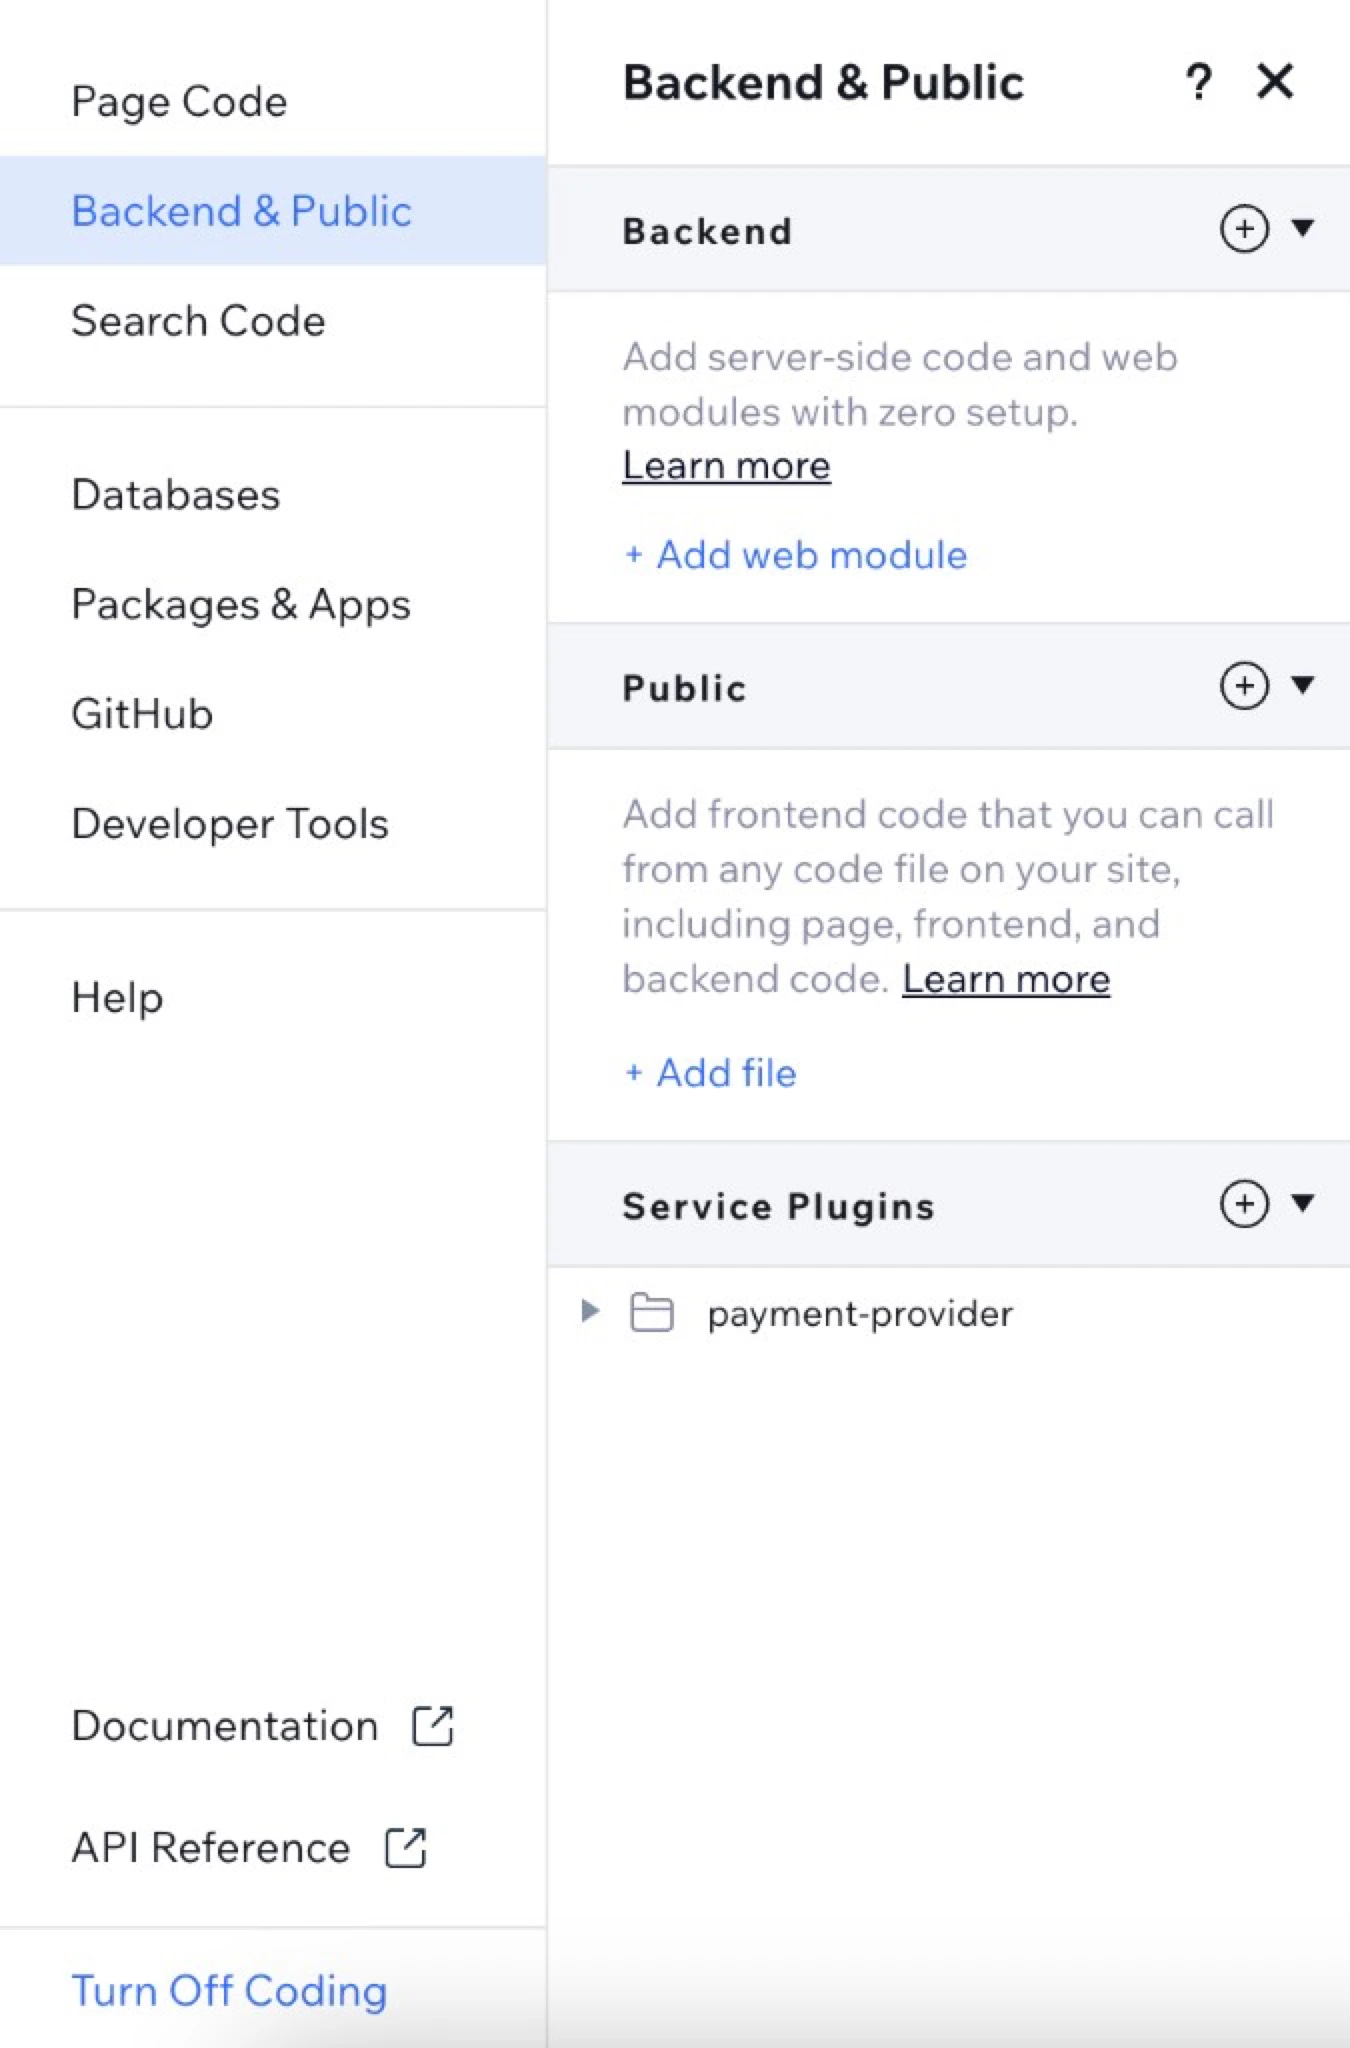
### Step 4 — Create Backend Configuration Files

In the **Backend** section, create the following configuration files:

* `payglocal-wrapper.js`
* `payglocal-constants.js`
* `http-functions.js` *(if required)*

<div className="payg-screenshot-tile payg-screenshot-tile--zoom payg-screenshot-tile--hq">
  <img src="https://mintcdn.com/payglocal/gXgve7lEqiVYdq6T/images/plugins/wix-backend-payment-provider.png?fit=max&auto=format&n=gXgve7lEqiVYdq6T&q=85&s=3796219a9a5ea44c726896cc139b0e35" alt="Wix Backend & Public panel with payment-provider folder" width="1350" height="2048" data-path="images/plugins/wix-backend-payment-provider.png" />
</div>

<Note>
  Replace the contents in the above files by copying the code from: [PayGlocal-Plugin-Configuration-Wix-Github](https://github.com/PayGlocal-Technologies)
</Note>

***

### Step 5 — Set Merchant-Specific Values

In the `payglocal-constants.js` file, enter the values as below:

| Constant       | Where to find it                                                            |
| -------------- | --------------------------------------------------------------------------- |
| `ACCOUNT_NAME` | **Settings → Website Settings → Site Address (URL)** — copy the domain name |
| `WEBSITE_NAME` | Enter your site URI here                                                    |

Also enter your **Public Key** in the designated field within the file.

***

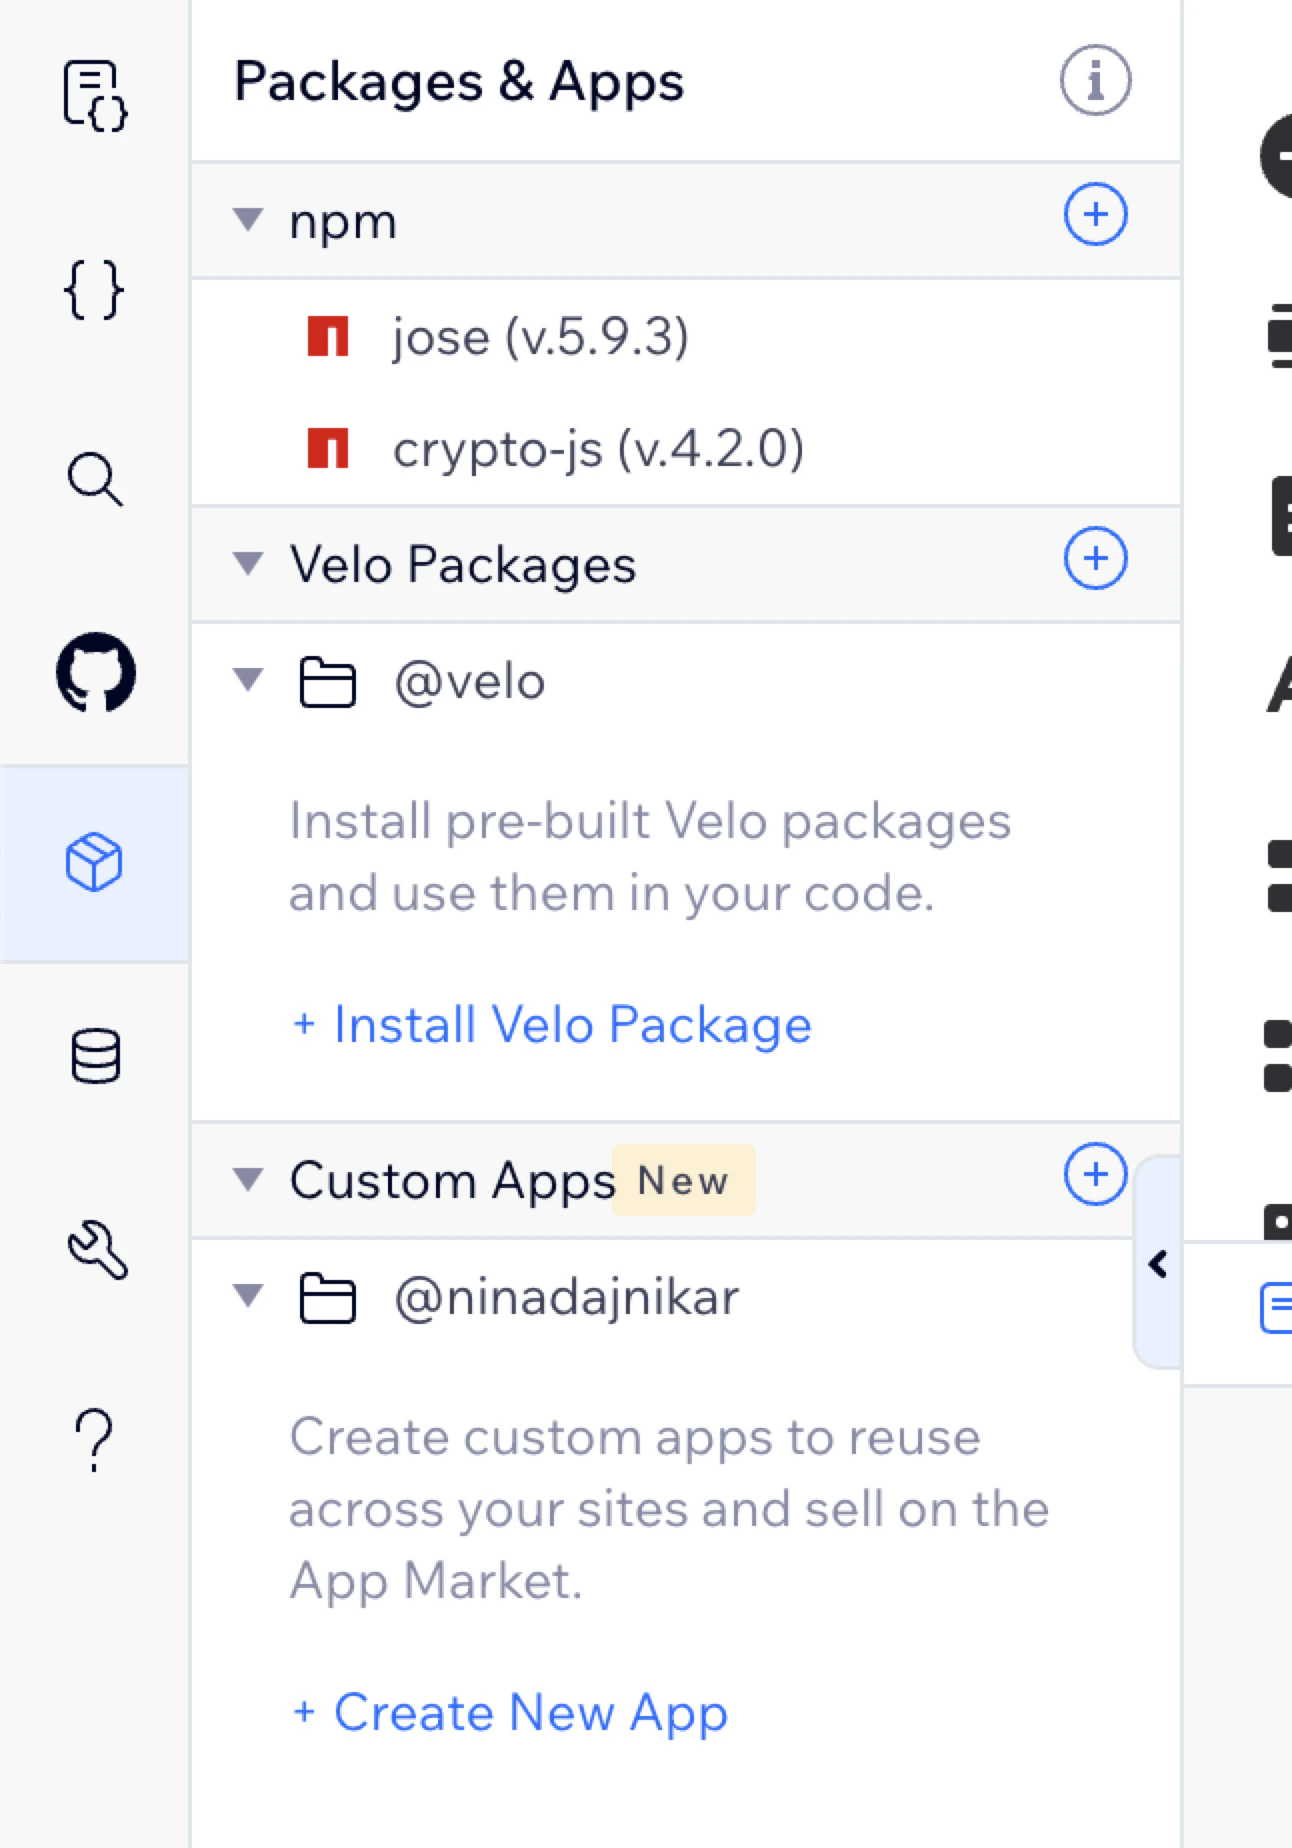
### Step 6 — Install npm Packages

Navigate to **Packages & Apps** in the Velo sidebar and install the following libraries via npm:

* `jose`
* `crypto-js`

<div className="payg-screenshot-tile payg-screenshot-tile--zoom payg-screenshot-tile--hq">
  <img src="https://mintcdn.com/payglocal/gXgve7lEqiVYdq6T/images/plugins/wix-npm-packages.png?fit=max&auto=format&n=gXgve7lEqiVYdq6T&q=85&s=f200994dcdf42f86540d846d72b52d08" alt="Wix Packages and Apps panel with jose and crypto-js installed" width="1292" height="1848" data-path="images/plugins/wix-npm-packages.png" />
</div>

***

### Step 7 — Publish the Website

Once all the changes are made, click the **Publish** button (top-right of the editor) to make PayGlocal live on your site.

***

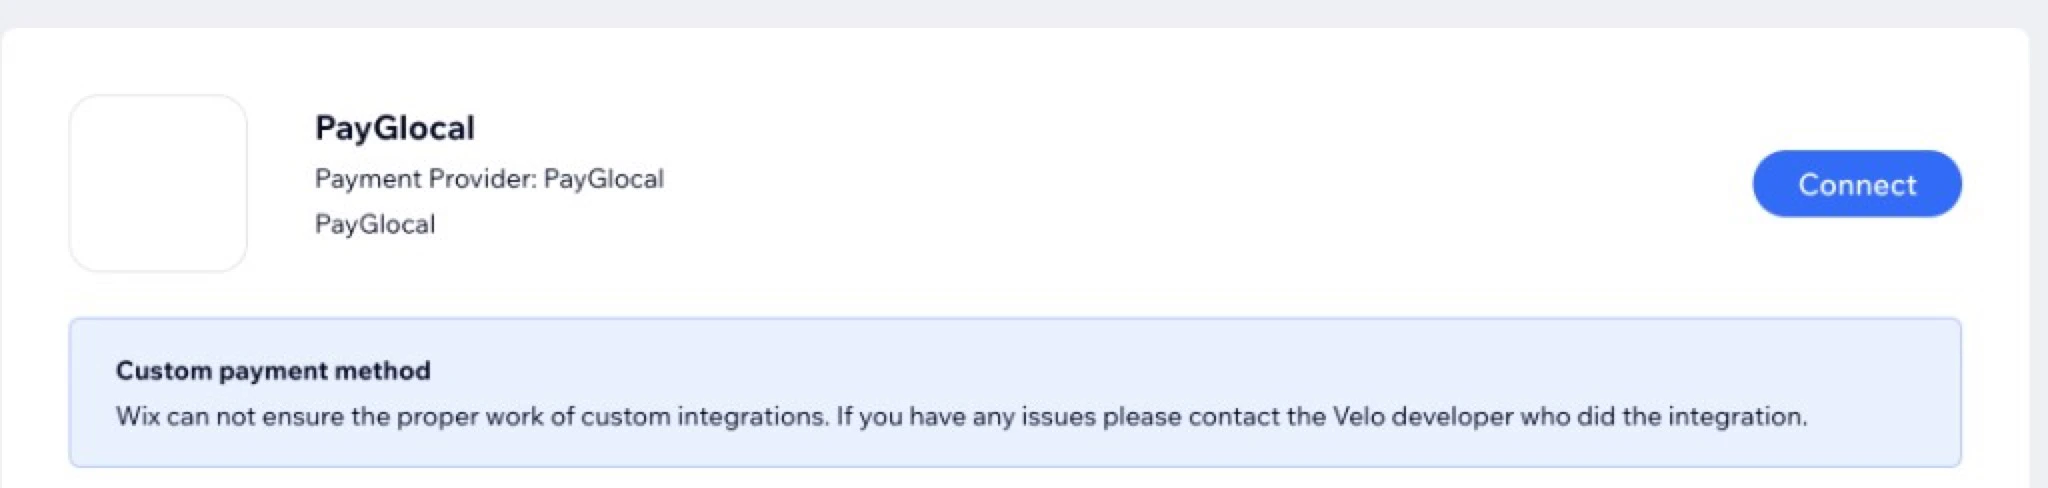
### Step 8 — Verify Plugin on Payment Page

After publishing, PayGlocal will appear as a plugin under the **Accept Payments** section.

<div className="payg-screenshot-tile payg-screenshot-tile--zoom payg-screenshot-tile--hq">
  <img src="https://mintcdn.com/payglocal/gXgve7lEqiVYdq6T/images/plugins/wix-connect-payment.png?fit=max&auto=format&n=gXgve7lEqiVYdq6T&q=85&s=c03a5ea3d771b5eb50bdc85ecbc5aad3" alt="PayGlocal listed as a payment provider with Connect button" width="2048" height="488" data-path="images/plugins/wix-connect-payment.png" />
</div>

***

## Activating PayGlocal for Payment Processing

To activate PayGlocal as a payment method:

<Steps>
  <Step title="Locate the PayGlocal plugin">
    Once the website is published, ensure PayGlocal is visible as a payment plugin under Accept Payments.
  </Step>

  <Step title="Enter credentials and connect">
    Enter your **Merchant ID** and **API Key** in the relevant fields and click **Connect**.
  </Step>

  <Step title="Ready to process">
    Upon successful connection, PayGlocal will be ready to process payments.
  </Step>
</Steps>

<Check>
  **Setup Successful** — Once you have followed all the steps above, the PayGlocal payment gateway is successfully set up with your Wix store.
</Check>

<Warning>
  If you face any installation errors, email us at [merchant.support@payglocal.in](mailto:merchant.support@payglocal.in) and we will get back to you at the earliest.
</Warning>

***

## Customer Journey

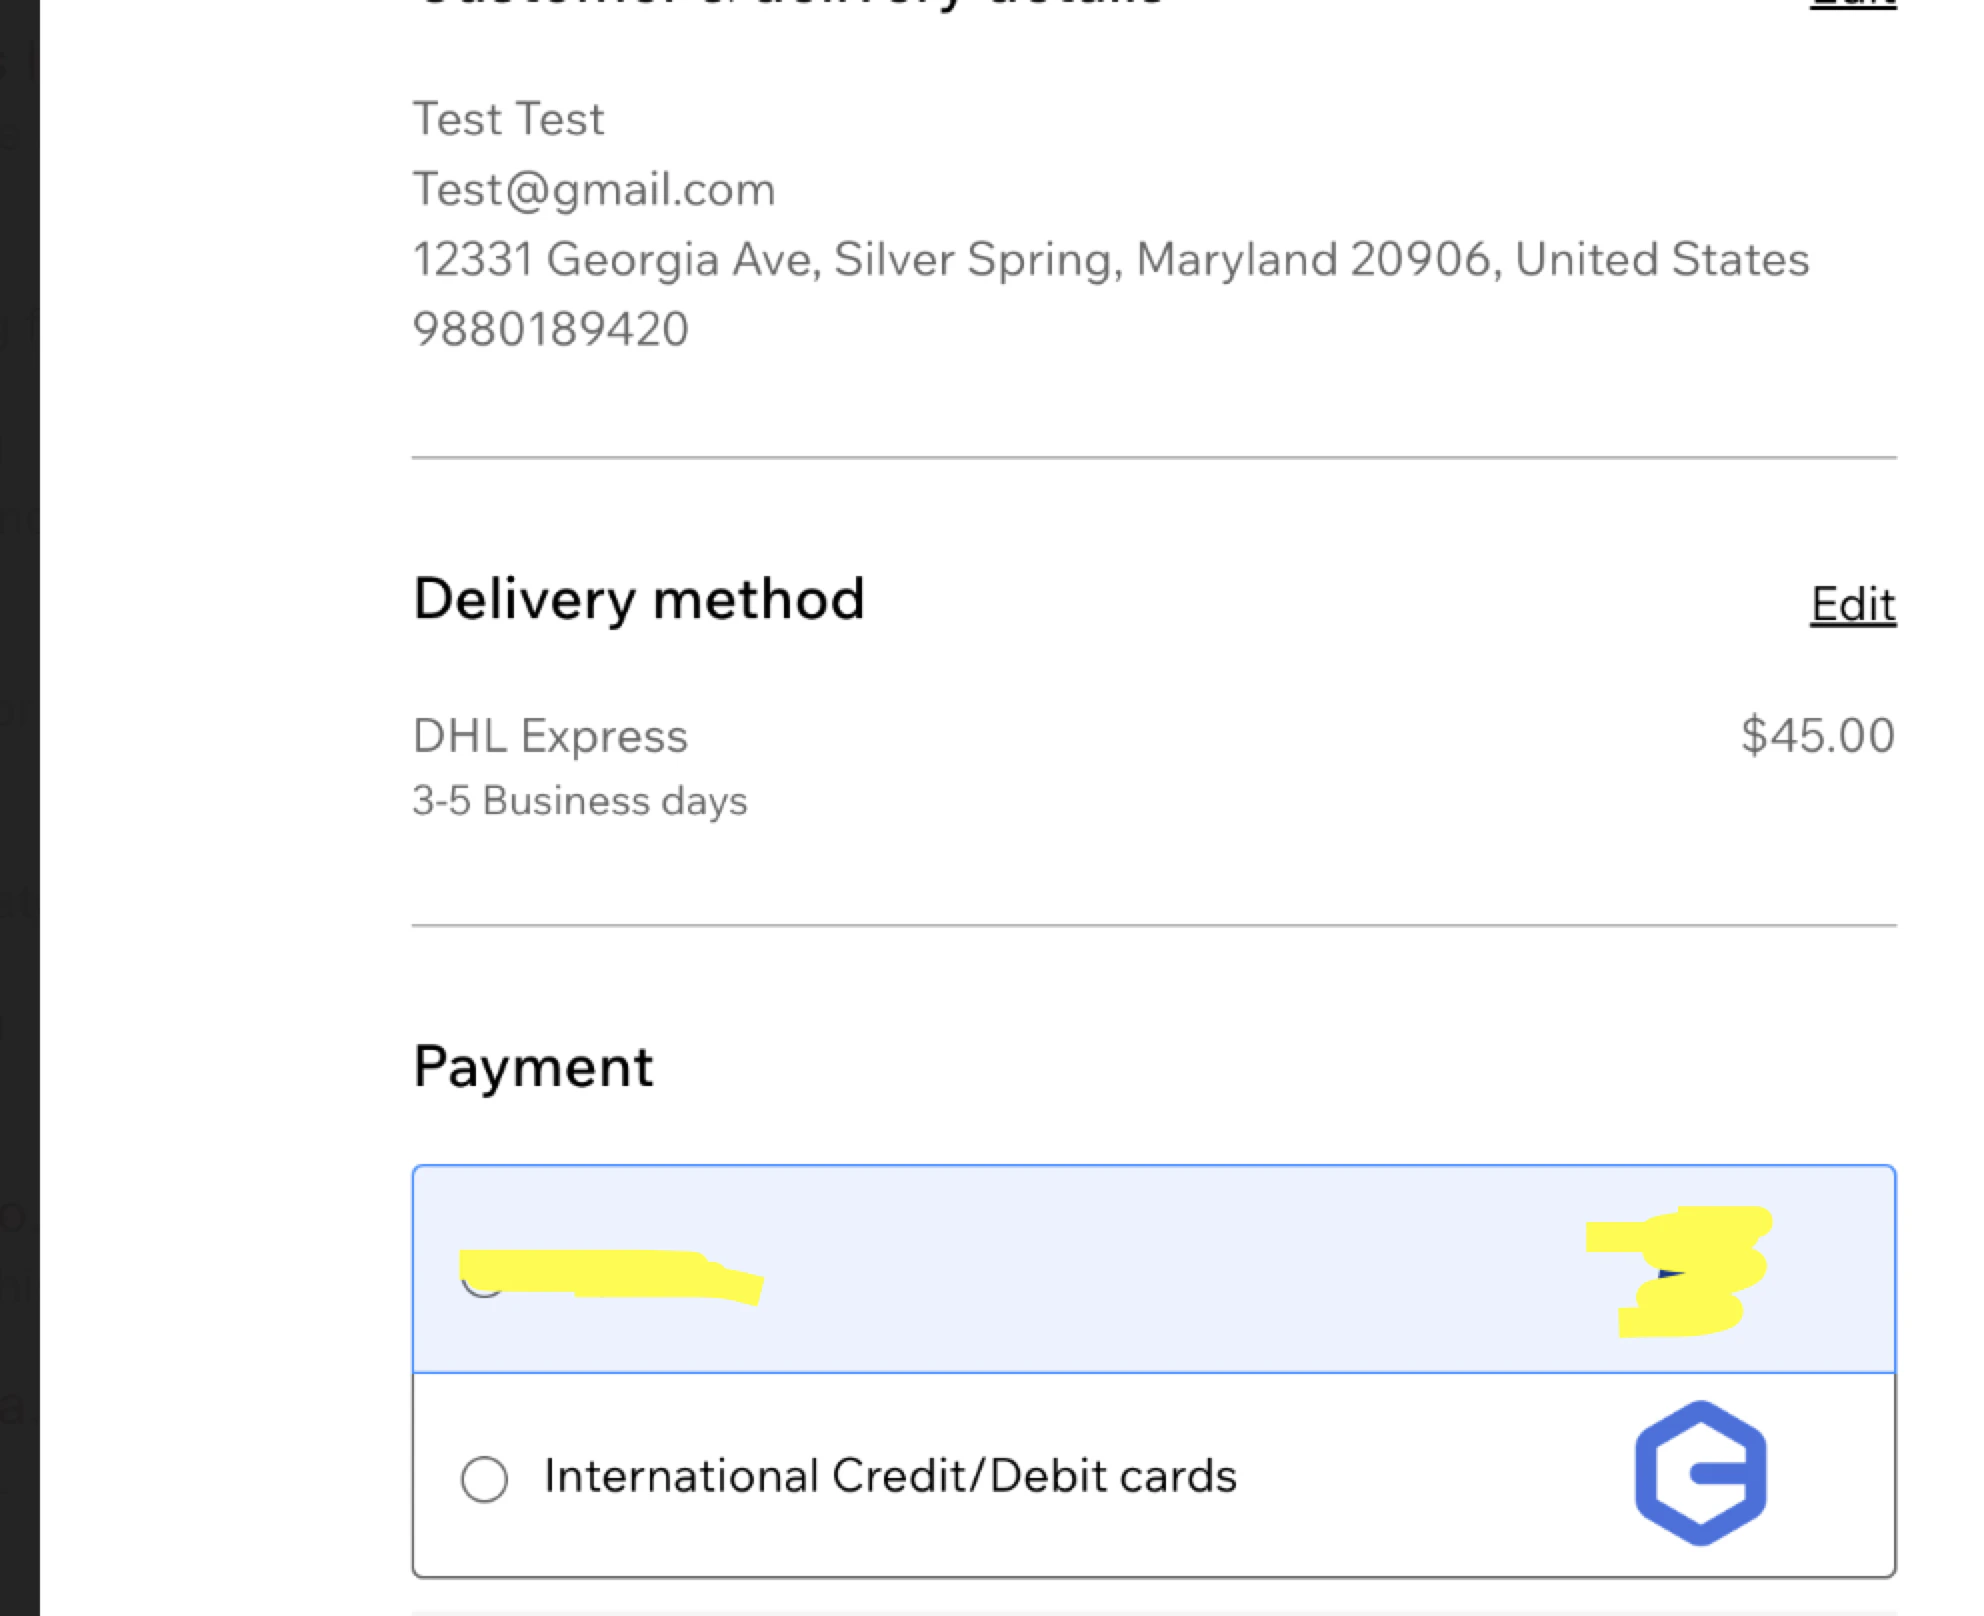
On the checkout page, PayGlocal will appear as a payment option. Upon selecting **International Credit/Debit cards (PayGlocal)**, the customer will be redirected to the payment page to complete the transaction.

<div className="payg-screenshot-tile payg-screenshot-tile--zoom payg-screenshot-tile--hq">
  <img src="https://mintcdn.com/payglocal/gXgve7lEqiVYdq6T/images/plugins/wix-checkout-payglocal.png?fit=max&auto=format&n=gXgve7lEqiVYdq6T&q=85&s=537e9e983702808a5101c174605be29d" alt="Wix checkout page showing PayGlocal as a payment option" width="1984" height="1616" data-path="images/plugins/wix-checkout-payglocal.png" />
</div>

After a successful payment, an order entry will be created in the **Orders** tab with all relevant transaction details.