Backend Implementation
Before your frontend can launch CodeDrop, your server must call PayGlocal’s Initiate Payment API and return theredirectUrl to your UI. CodeDrop will use this URL to load the payment form.
Step 1 — Enable CodeDrop for Your MID
Contact your PayGlocal account manager. The operations team will enable CodeDrop for your Merchant ID and provide acdId — your CodeDrop configuration identifier.
Step 2 — Add the Script Tag
Add this script tag to your HTML<head> or at the end of <body>:
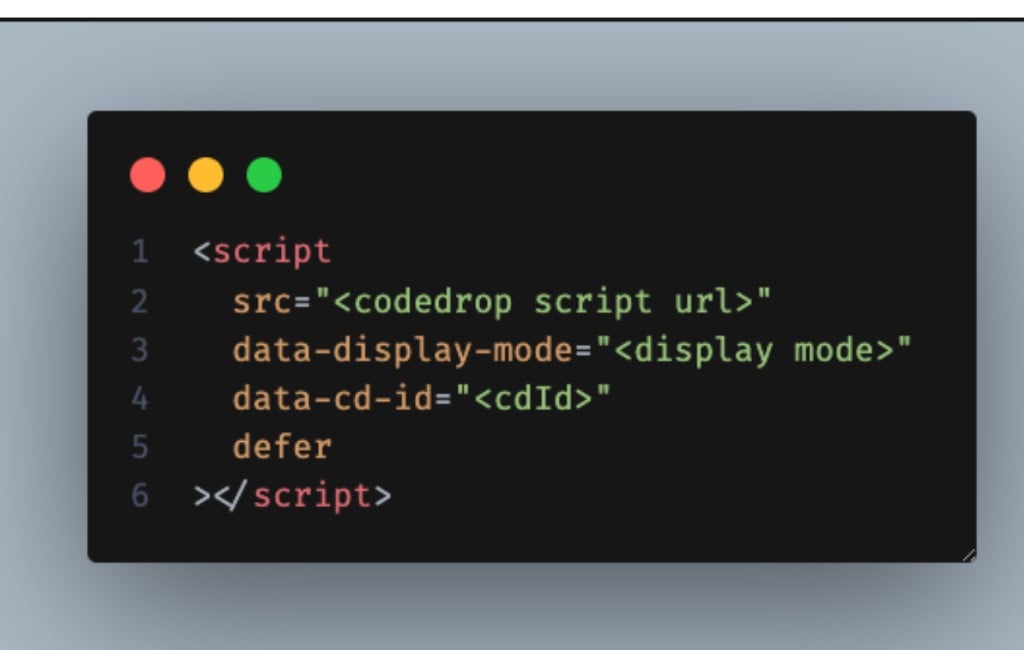
Script URLs:
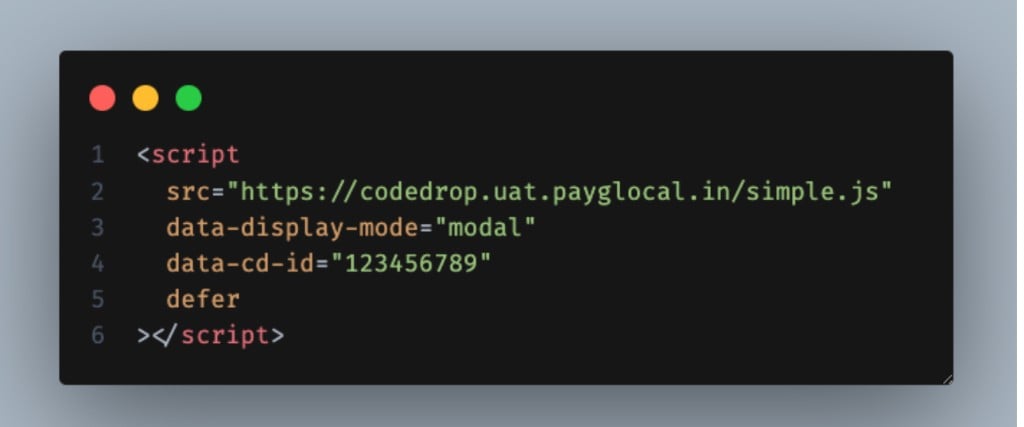
Example — modal mode, UAT environment, cdId
123456789:
Step 3 — Add Payment Container (Inline mode only)
Forinline display mode, place this container <div> at the location in your page where the payment form should render:
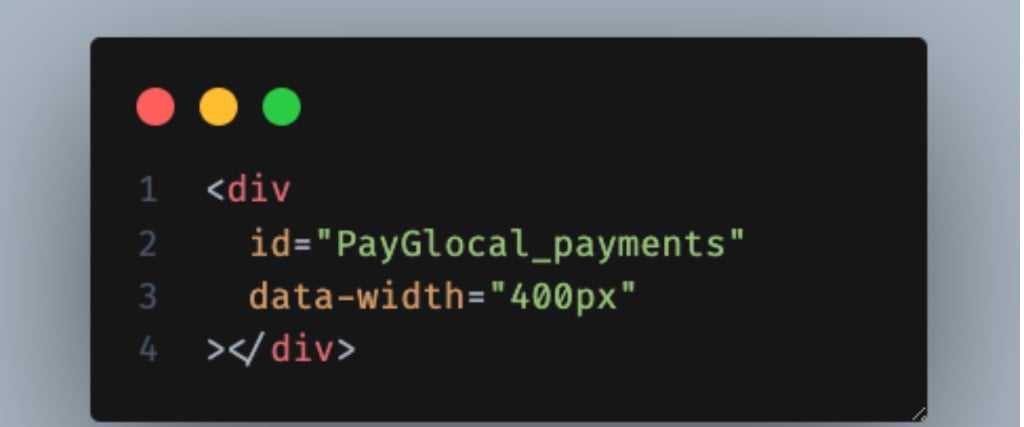
Skip this step for
modal and drawer modes.
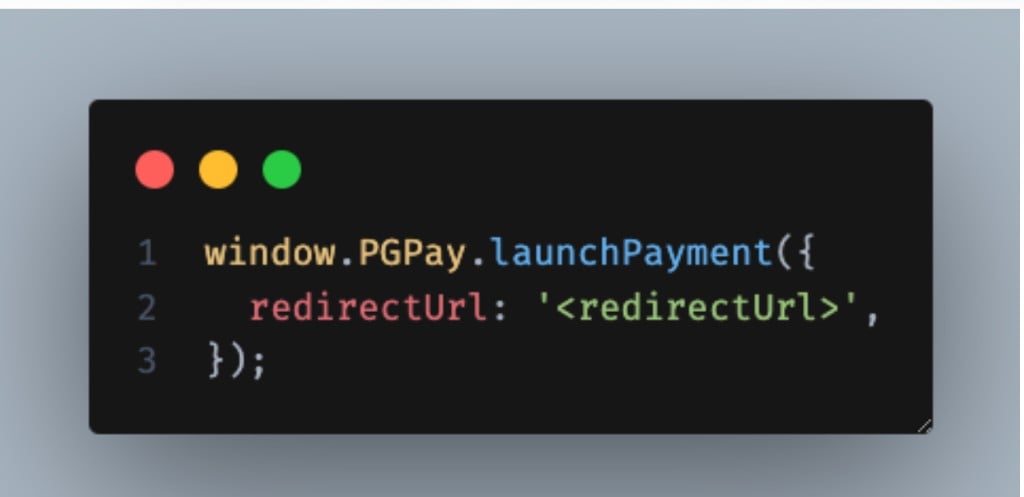
Step 4 — Launch the Payment Form
When the customer clicks your payment button, pass theredirectUrl from your backend to CodeDrop:
redirectUrl from your backend via axios, then launching CodeDrop:
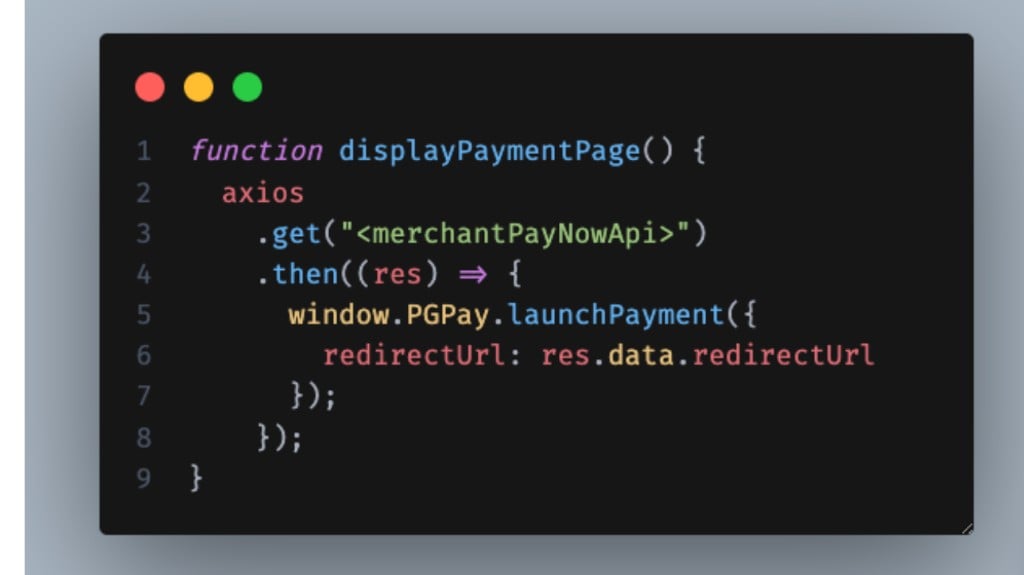
<merchantPayNowApi> with your backend endpoint that returns the redirectUrl.
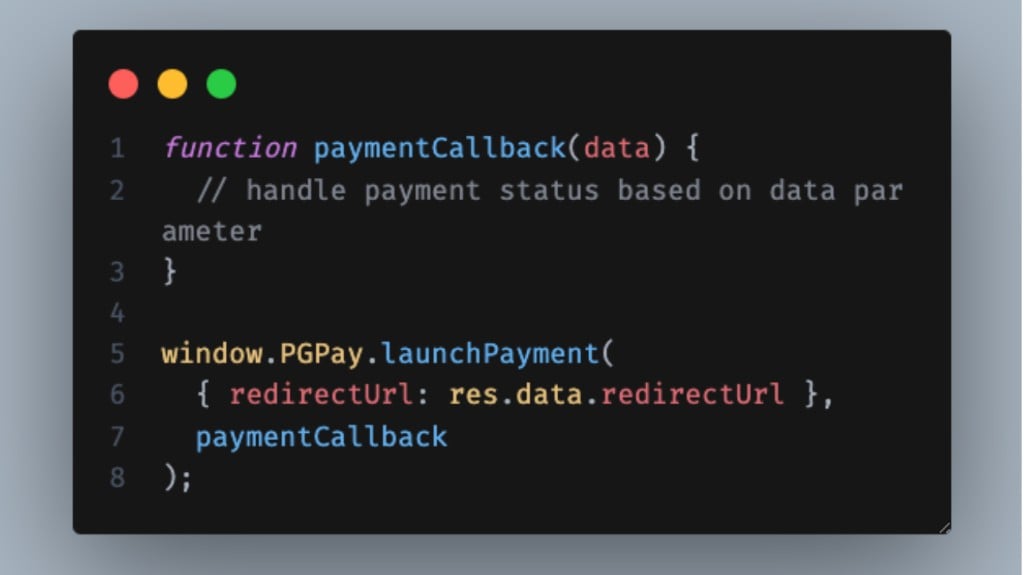
Step 5 — Handle the Payment Callback
After the payment completes, is cancelled, or is abandoned, CodeDrop closes automatically and invokes your callback function. Pass it as the second argument tolaunchPayment():
data object your callback receives:
Step 6 — Custom Pay Now Action (Inline mode only)
If you hide the default PayNow button inside the inline form and use your own, wire your button’sonclick to:
event parameter is the onclick event of your PayNow button element and is mandatory.
Step 7 — Pass Updated Billing & Shipping Details (Inline mode only)
If your billing and shipping forms are on the same page as the inline payment widget, the customer might update their address after the widget has already loaded. Use this to push updated details to the payment form in real time: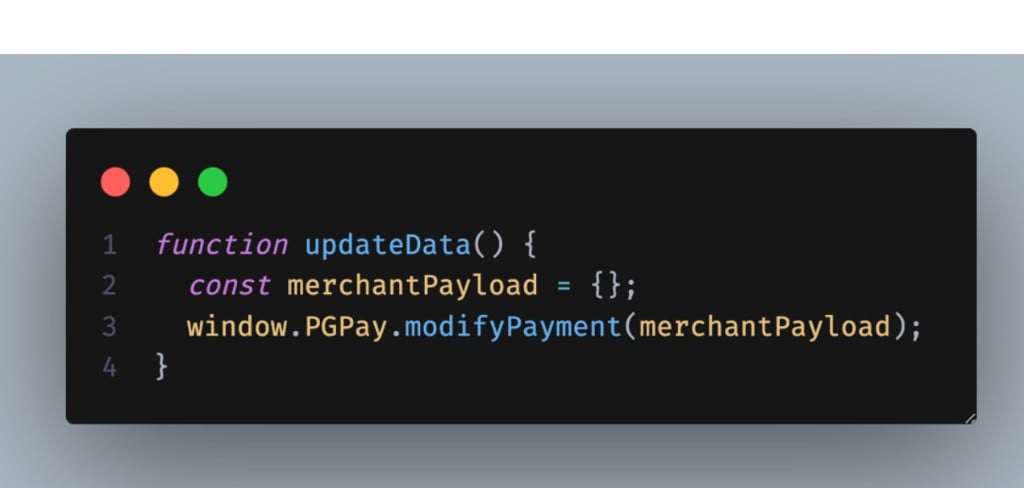
merchantPayload format:
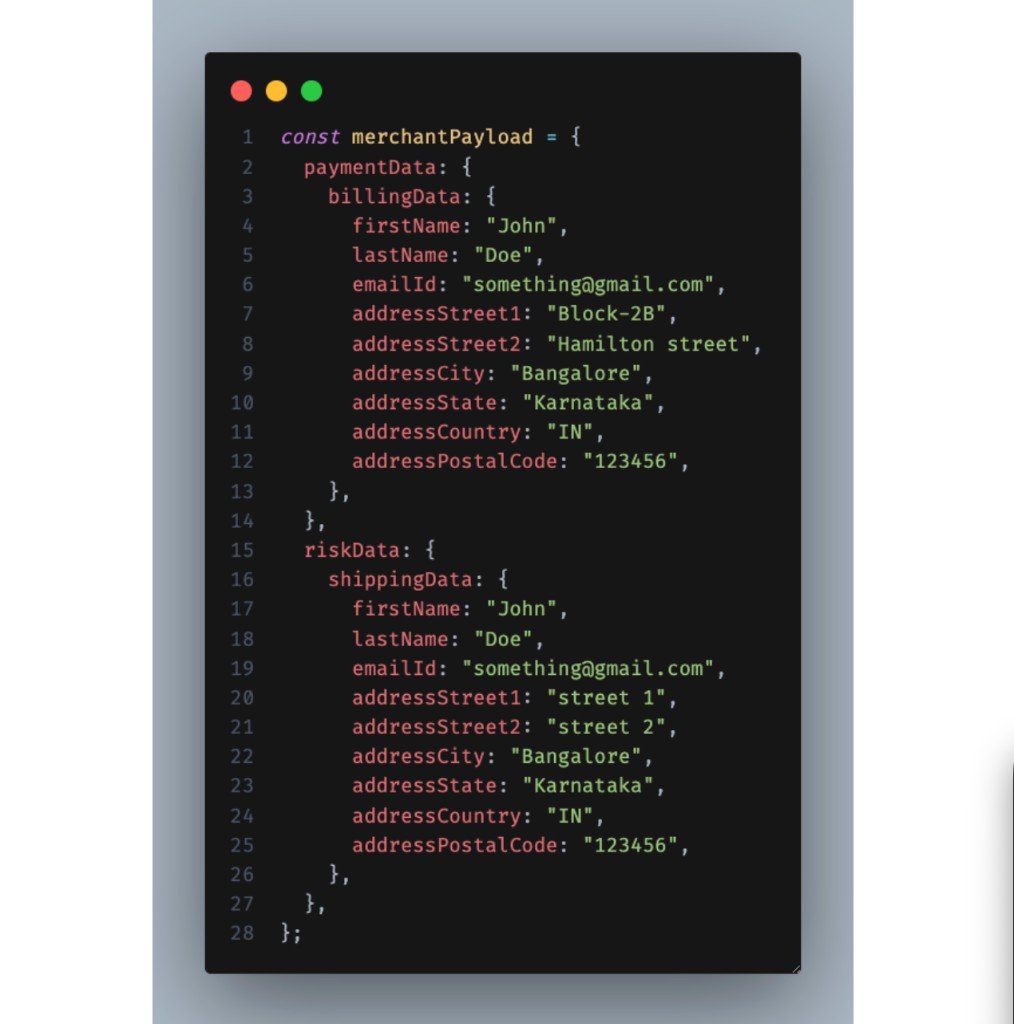
- You can send
billingData,shippingData, or both — any fields you omit are left unchanged - Data entered directly by the customer on the payment form always takes highest priority — if the customer typed something, it overrides what you send here