

What is a Payment Link?
A Payment Link is a shareable URL that lets you collect payments without any coding or API integration. Create a link in the GCC dashboard, share it with your customer via email, SMS, or WhatsApp (domestic) or email (international), and they complete payment on PayGlocal’s secure hosted checkout page.How to Create a Payment Link
1
Navigate to Payment Links
Log in to the GCC dashboard and click on Payment Links in the left sidebar under Payment Products.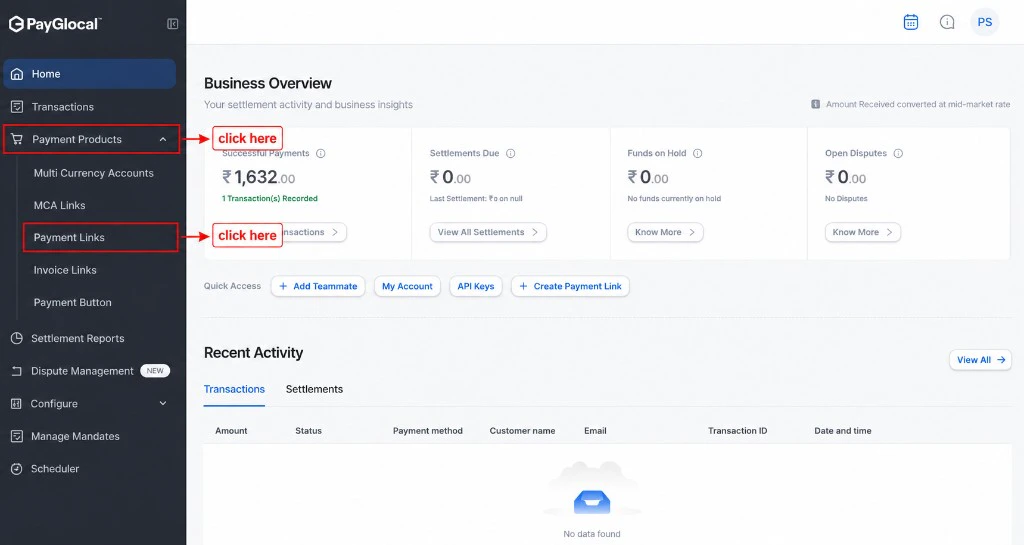
2
Access Payment Links Page
You’ll see the Payment Links management page where you can view all your existing links and create new ones.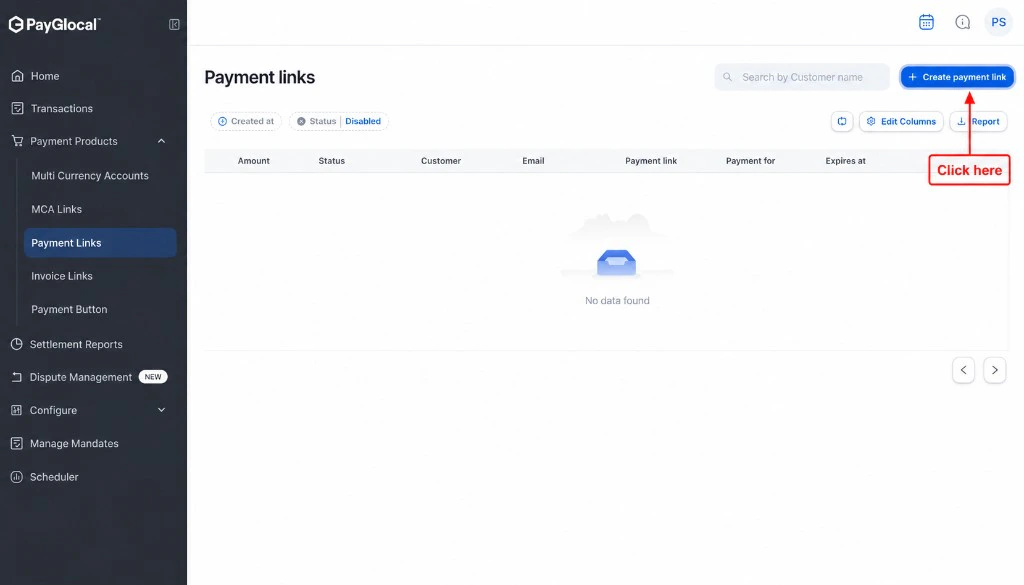
3
Create New Link
Click the + Create payment link button in the top right corner to open the payment link creation form.
4
Fill Payment Details
Complete the payment link form with the following information: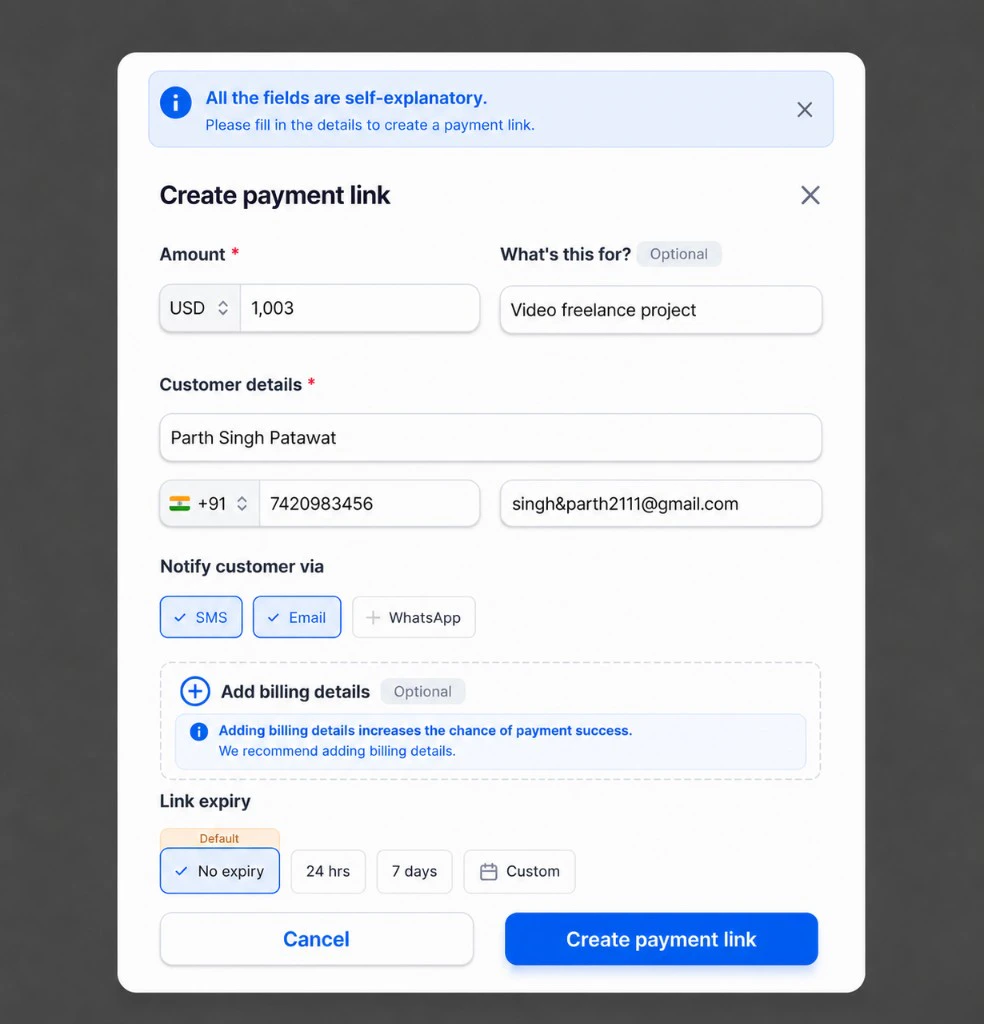
5
Generate the Link
After filling all required fields, click the Create payment link button at the bottom of the form.
6
Share the Link
Once generated, the system will:
- Display the Payment Link ID (PLID) and shareable URL
- Automatically send the link to the customer’s email and/or mobile (based on your selection)
- Allow you to copy the URL and share it through any other channel
Customer Notifications:
- International Customers: Notifications are sent via Email only
- Domestic Customers (India): Notifications are sent via both Email and SMS/WhatsApp
7
Track Status
Monitor payment attempts, link status, transaction details, and customer information in real time from the Payment Links dashboard.
Payment Link Status
Your payment links can have the following statuses:Customer Experience
When a customer receives and clicks on a payment link:- Link Opens: The customer is directed to PayGlocal’s secure hosted checkout page
- Information Review: Customer reviews the payment amount, description, and merchant details
- Payment Details: Customer enters their payment method details (card, UPI, net banking, etc.)
- Authentication: For card payments, the customer completes 3D Secure (3DS) verification on the issuer’s page — an extra check to confirm the cardholder. For some domestic flows, an OTP may also be required. Together, these steps help prevent fraud on card transactions.
- Confirmation: Customer receives instant confirmation of payment success or failure
- Receipt: PayGlocal sends a payment receipt to the customer’s email/mobile
Next Steps
Invoice Link
Learn about invoice-style payment requests
Payment Button
Embed payment buttons on your website
Dashboard Overview
Learn more about the GCC dashboard
Support
- Business and product questions: Contact your PayGlocal account manager
- Technical issues or errors: Email merchant.support@payglocal.in
- Dashboard access: Reach out to your account manager for credentials