What is a Payment Button?
A Payment Button is a no-code solution that allows you to add a payment button to your website without any API integration. When you create a payment button in the GCC dashboard, you receive JavaScript and HTML scripts that you can simply paste into your website.When to Use Payment Button?
Payment Button is ideal when:- Dynamic Amounts: The payment amount needs to be entered by the customer (not fixed)
- Quick Website Integration: You want to add payment functionality without backend development
- No API Knowledge Required: You can embed payments by just copying and pasting code
How to Create a Payment Button
1
Navigate to Payment Button
Log in to the GCC dashboard, click on Payment Products in the left sidebar, then select Payment Button.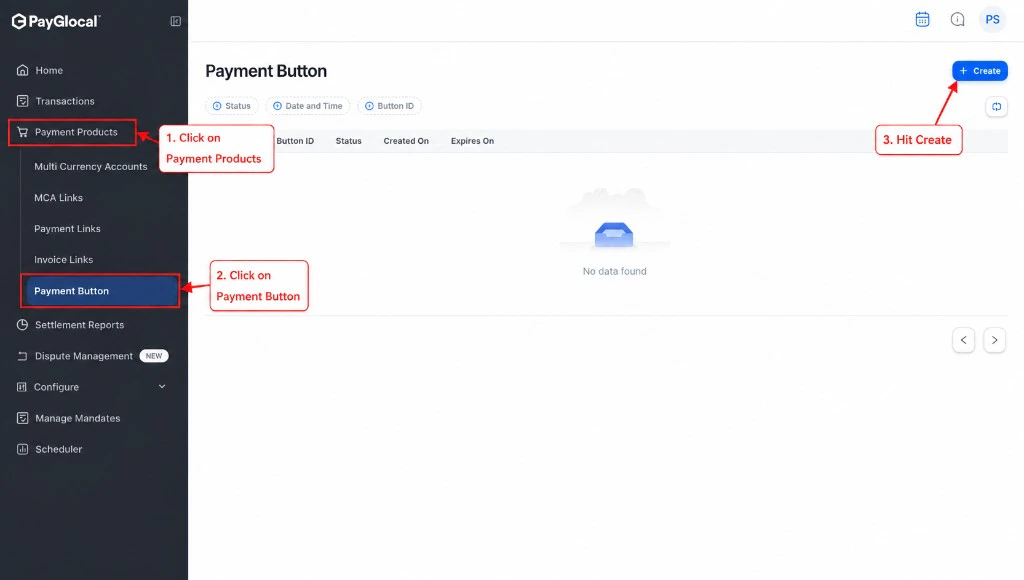
2
Click Create
Click the Create button in the top right corner to open the payment button creation form.
3
Configure Payment Button
Fill in the required details: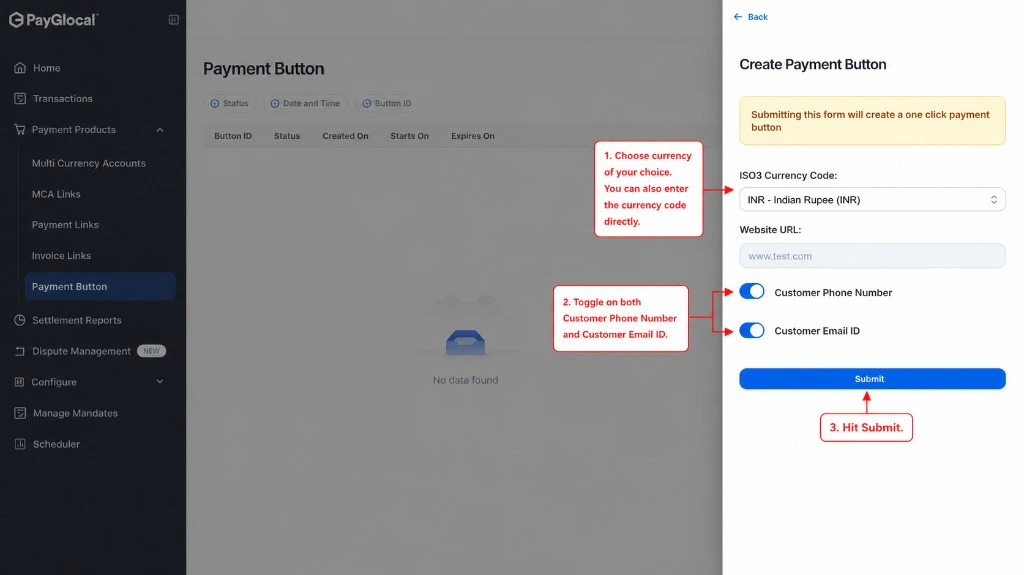
- ISO3 Currency Code: Select the currency (e.g., INR for Indian Rupee)
- Website URL: Enter your website URL where the button will be embedded
- Customer Phone Number: Toggle on/off to collect customer phone number
- Customer Email ID: Toggle on/off to collect customer email
4
Submit
Click the Submit button to generate your payment button.
5
Copy the Scripts
After submission, open the button from the Payment Button dashboard. The Payment Button is retrieved panel shows your Button ID and Embed Code.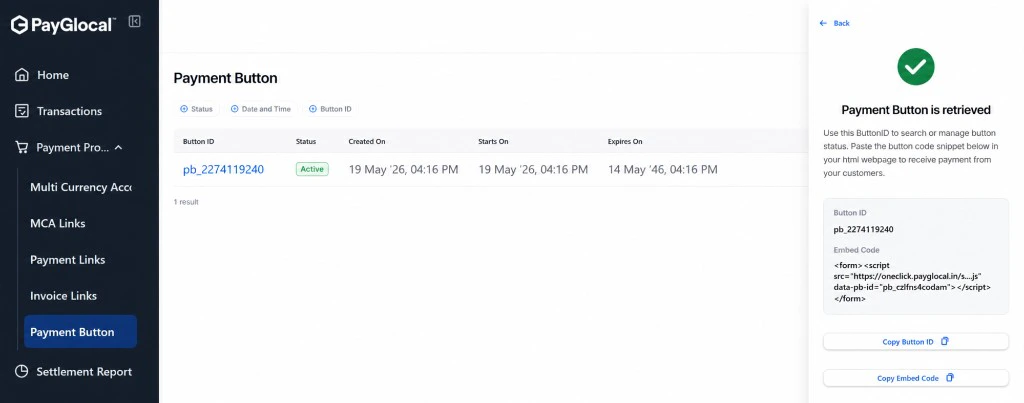
- Click Copy Button ID to save the button reference for search and status checks
- Click Copy Embed Code and paste the snippet into your website HTML where customers will pay
6
Embed on Your Website
- Copy the JavaScript script and add it to your website
- Copy the HTML button code and place it where you want the button
- Test the button to ensure it works correctly
- The customer will be able to enter the payment amount when they click the button
How Payment Button Works
When a customer clicks your payment button:- Button Click: Customer clicks the payment button on your website
- Enter Amount: Customer enters the payment amount (dynamic)
- Enter Details: Customer fills in required information (email/phone if enabled)
- Payment Page: Customer is directed to PayGlocal’s secure checkout
- Complete Payment: Customer completes payment using their preferred method
- Confirmation: Customer receives payment confirmation and returns to your website
Customer Experience
 Screenshot showing customer entering amount and making payment - Coming soon
Managing Payment Buttons
From the Payment Button dashboard, you can:- View All Buttons: See all payment buttons you’ve created
- Check Status: Monitor which buttons are active
- View Transactions: See all payments made through each button
- Edit Button: Update button configuration
- Enable/Disable: Activate or deactivate buttons as needed
Button Embed Preview
 Screenshot showing how the button appears on a website - Coming soon
Next Steps
Payment Link
For fixed amount payments with shareable links
Invoice Link
For formal invoice-style payments
API Integration
For full API integration and customization
Webhooks
Set up real-time payment notifications
Support
- Technical integration help: Email merchant.support@payglocal.in
- Business inquiries: Contact your PayGlocal account manager
- Dashboard access: Reach out to your account manager for credentials